Mastering Three-Point Perspective: Step-by-Step Tutorial for Dramatic Worm’s-Eye View Cityscapes

Description:
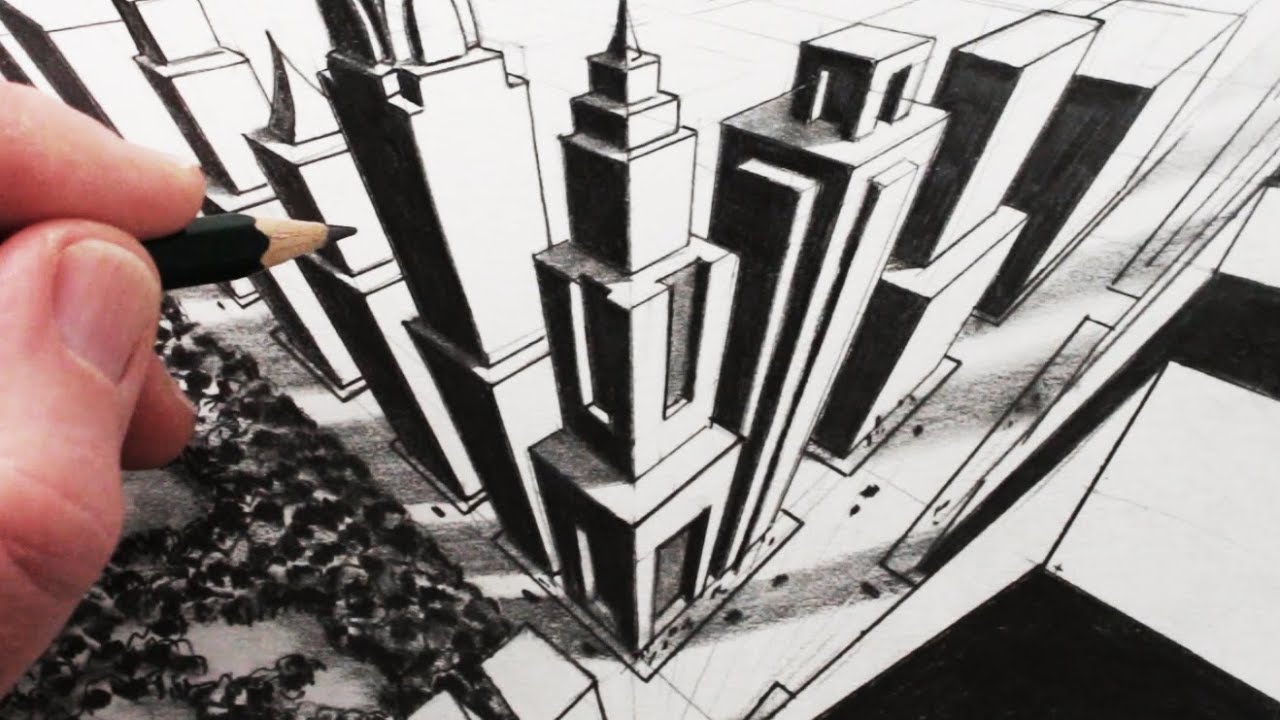
Three-point perspective is a powerful technique in drawing that adds intense drama and scale to architectural scenes, especially when viewing buildings from below (worm’s-eye view) or above (bird’s-eye view). Unlike one- or two-point perspective, it introduces a third vanishing point, making vertical lines converge for a sense of height, depth, and immersion. This comprehensive tutorial breaks down a simplified yet effective “drawing method” from the reference image, which uses a single square as a starting point to establish accurate perspective for tall skyscrapers. Ideal for concept artists, illustrators, urban sketchers, and beginners in perspective drawing, this approach ensures proportional buildings without complex horizon setups initially. The final example in the reference—a dynamic cityscape with towering structures highlighted in red—demonstrates how this method creates convincing, imposing architecture.


Understanding the Reference Image
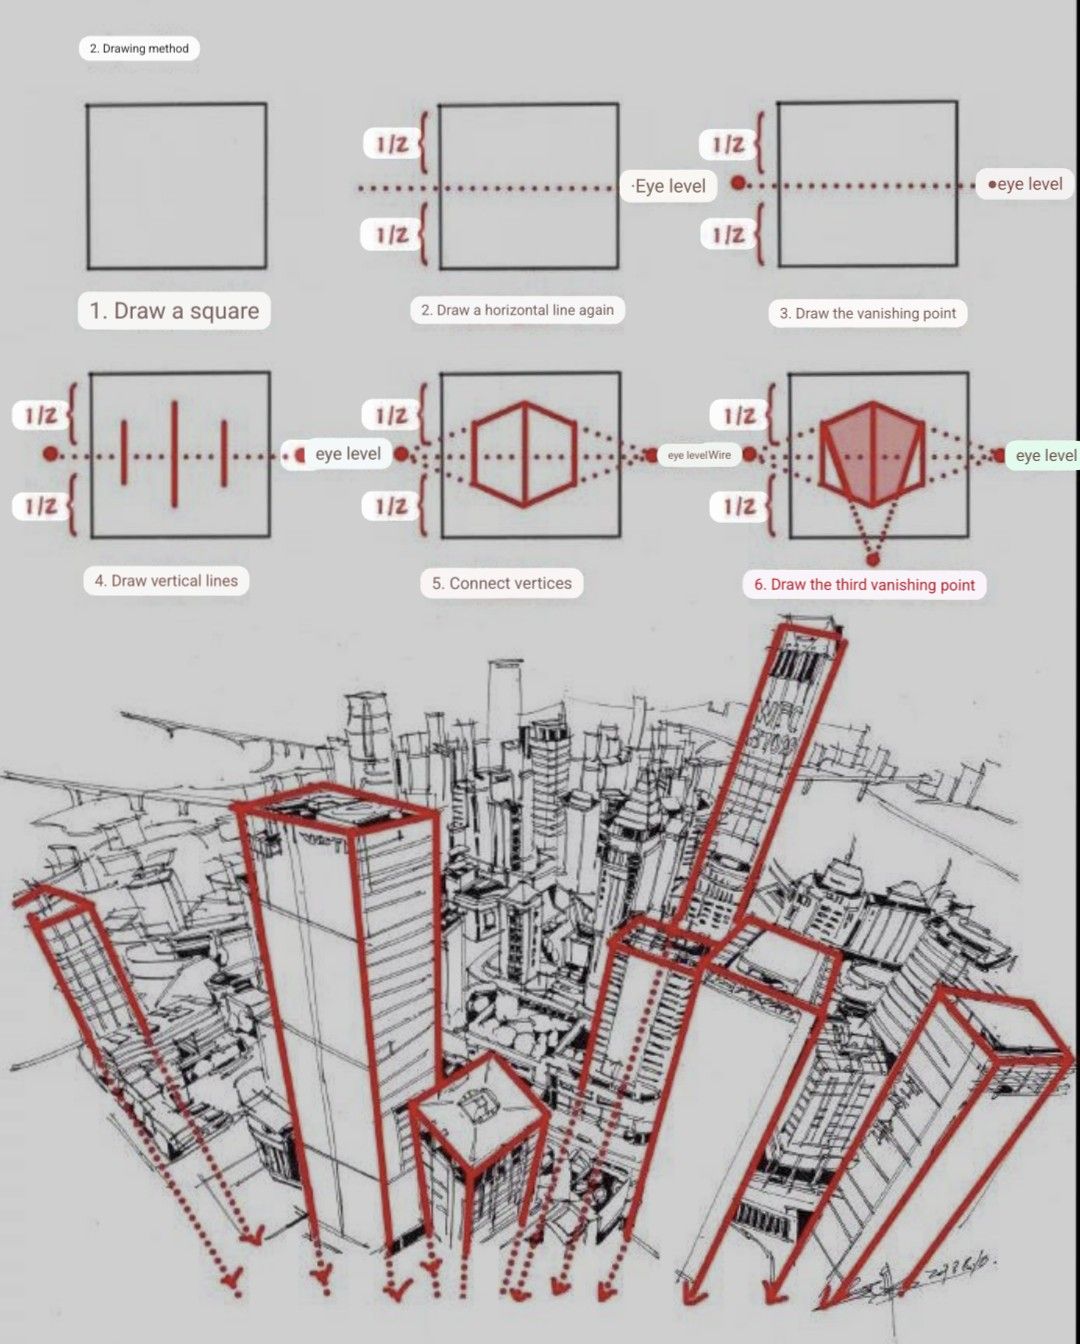
The reference provides a clear six-step progression for constructing a basic form in three-point perspective, tailored for worm’s-eye views:
- Draw a square: A simple boundary for the base.
- Draw a horizontal line again: Divides the square vertically into halves, with a dotted “eye level” line at mid-height.
- Draw the vanishing point: Places a point on the eye level line for initial convergence.
- Draw vertical lines: Adds parallel verticals inside the square, divided into halves.
- Connect vertices: Forms a prism-like shape by connecting to the vanishing point.
- Draw the third vanishing point: Introduces a lower vanishing point below the square, with lines converging downward for dramatic upward tilt.
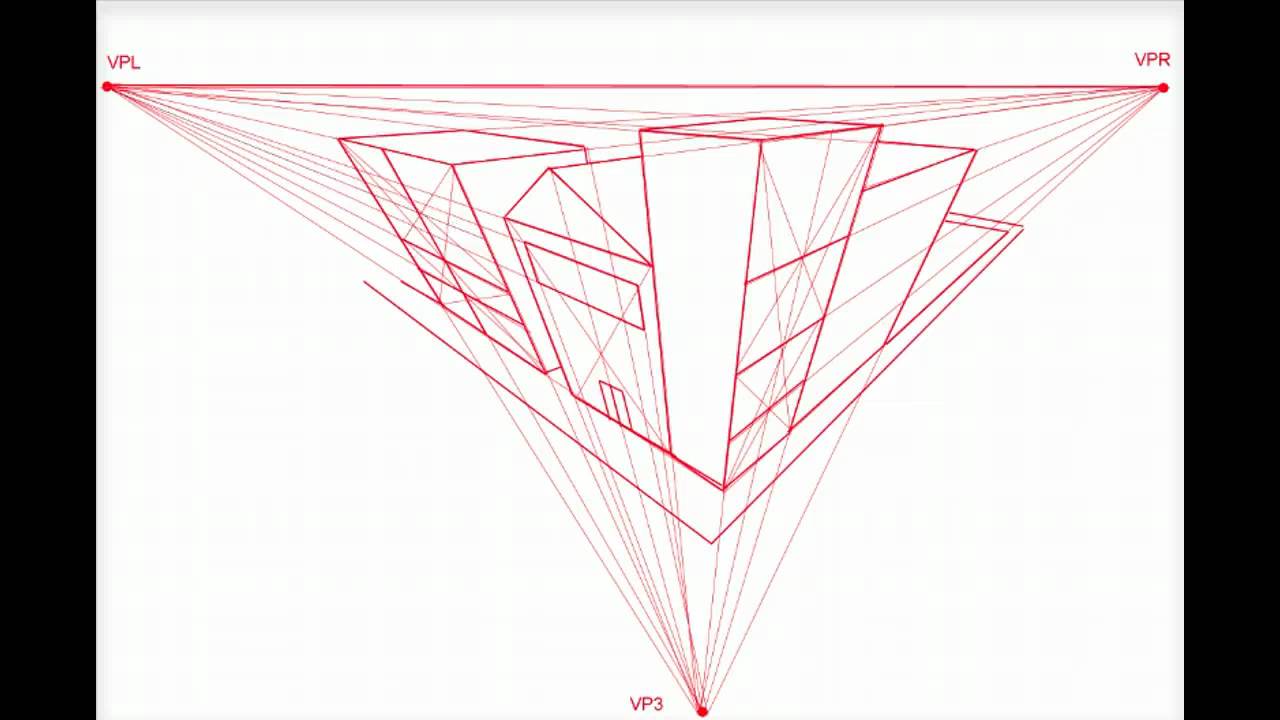
The bottom section shows the application: Multiple skyscrapers in a cityscape, with red overlays emphasizing convergence to the third (lower) vanishing point, creating a towering, foreshortened effect as if looking up from street level.
This method cleverly starts with a flat square and builds vertical exaggeration, making it accessible for freehand sketching tall structures.


Key Principles of Three-Point Perspective
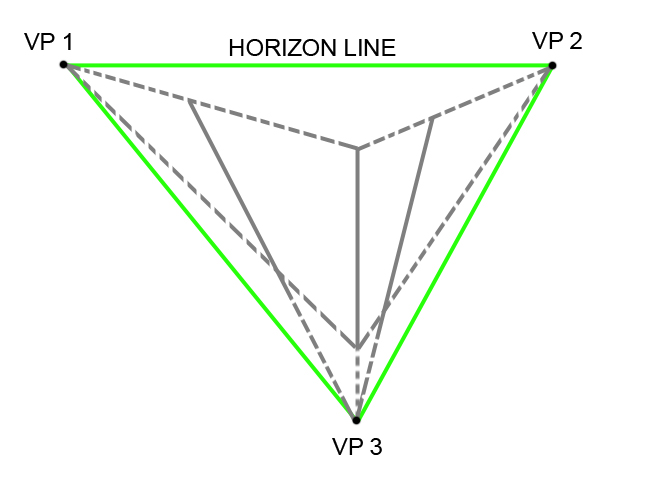
- Vanishing Points: Two on the horizon line (for horizontal convergence, often off-page), one vertical (above for bird’s-eye, below for worm’s-eye).
- Eye Level: Critical reference—objects above converge downward, below upward.
- Foreshortening: Extreme in three-point, enhancing scale (e.g., buildings appear massive).
- Applications: Comic book panels, matte painting, environment design in games/film.
For worm’s-eye views (as in the reference), the third vanishing point is below, making verticals lean inward upward.
Step-by-Step Tutorial: Drawing in Three-Point Perspective (Worm’s-Eye View)
Use pencil for construction lines, ruler for accuracy (or freehand for urban sketching). Paper size: A4 or larger.
- Establish the Base Square (Step 1):
- Draw a perfect square—this represents the ground plane or building footprint viewed straight-on initially.
- Pro Tip: Keep it centered; size determines building width.
- Add the Horizon and Eye Level (Step 2):
- Draw a horizontal line through the middle of the square (eye level).
- Mark halves vertically with dotted lines for symmetry.
- Place Initial Vanishing Points (Step 3):
- On the eye level line, place a central vanishing point (often inside or near the square).
- This handles initial depth.
- Draw Vertical Divisions (Step 4):
- Add vertical lines parallel within the square, divided into equal halves.
- These become building edges.
- Connect to Form Depth (Step 5):
- Draw lines from corners/top-bottom to the central vanishing point, creating a tapered prism.
- Introduce the Third Vanishing Point (Step 6):
- Below the square (off-page for drama), place the vertical VP.
- Connect all vertical lines to this point—they now converge downward, simulating looking up.
- Build the Cityscape:
- Duplicate the form for multiple buildings, varying heights and positions.
- Add details: Windows (follow perspective lines), roofs, antennas.
- Overlay red guidelines (as in reference) to check convergence.
- Shade for depth: Darker at bases, lighter tops.
- Refine and Ink:
- Erase construction lines.
- Vary line weights: Thicker foreground, thinner distance.
- Add atmosphere: Haze, birds, street elements.
Common Mistakes to Avoid: Inconsistent convergence (always check lines to VPs), flat verticals (defeats three-point purpose).

Advanced Tips and Variations
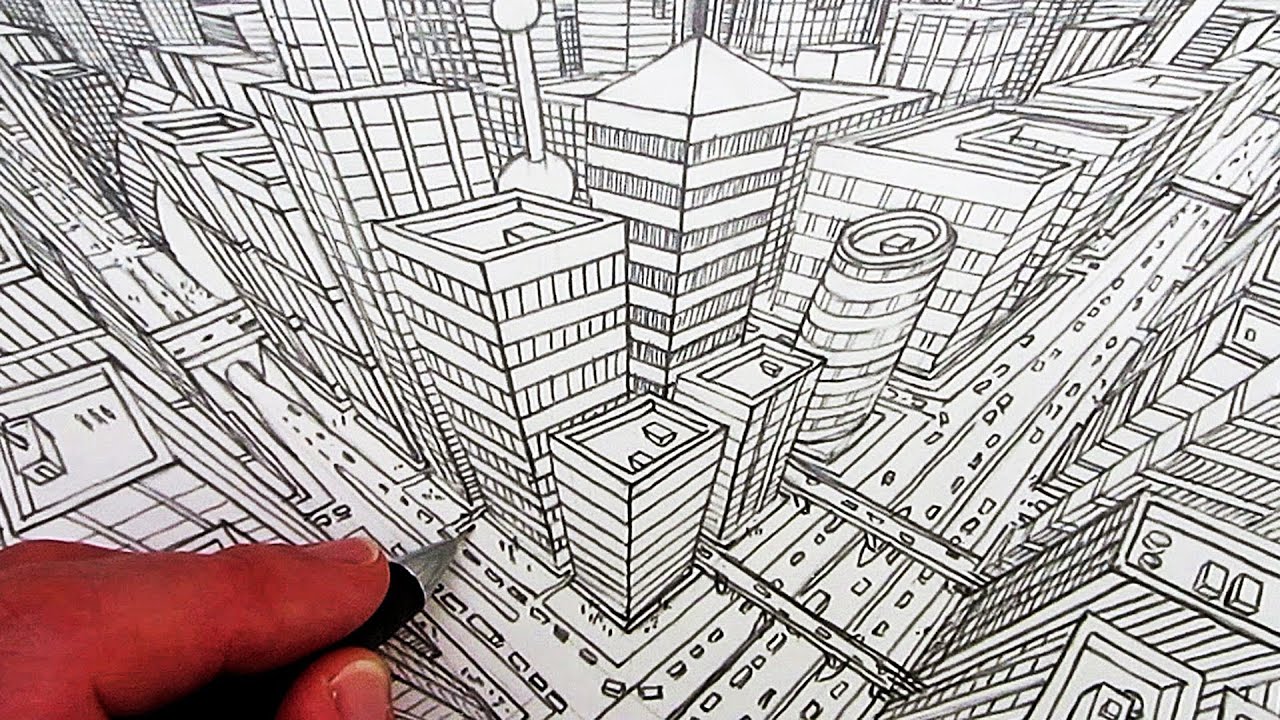
- Bird’s-Eye View: Flip the third VP above for top-down drama.


- Digital Tools: Use Clip Studio Paint or Procreate perspective grids.
- Practice: Start with single buildings, progress to full cities.
- Inspiration: Study artists like Syd Mead or Kim Jung Gi for urban perspectives.
This method from the reference image demystifies three-point perspective, enabling epic city views with minimal setup. Perfect for adding wow-factor to your sketches. Download the reference for tracing practice, try the steps, and share your cityscapes below! For more, explore books like “Perspective! for Comic Book Artists” by David Chelsea or online resources on perspective fundamentals.