Understanding Perspective in Drawing: How Eye Level Affects Foreshortening and Circular Forms – A Visual Tutorial with Citrus and Apple Halves
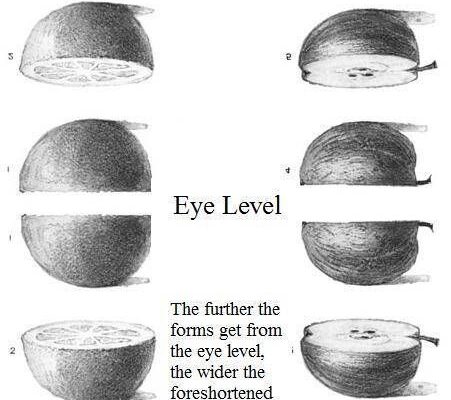
In the art of realistic drawing and observational sketching, mastering perspective and foreshortening is essential for creating lifelike three-dimensional forms on a two-dimensional surface. This detailed visual tutorial uses a classic art school exercise—halved citrus fruits (lemon/orange) and an apple—to demonstrate how eye level dramatically alters the perceived shape of circular objects.
The Core Principle: Foreshortening and the Ellipse
When we observe a circular object (like the cut face of a fruit), its appearance changes depending on our viewing angle relative to eye level:
- At eye level, a true circle appears as a straight horizontal line (maximum compression).
- Above or below eye level, the circle transforms into an ellipse, with the degree of elongation determined by the angle of view.
- The farther the form is from eye level, the wider and more open the ellipse becomes—approaching a full circle when viewed directly from above or below.
Visual Breakdown: Three Viewing Positions
1. Above Eye Level (Top Section)
- Left (Citrus): Stages 3 → 5 → 1
- Right (Apple): Stages e → a → d
- As the viewer looks downward from above, the circular cut surfaces appear as increasingly compressed ellipses.
- The horizon line is below the objects, causing extreme foreshortening.
- Key Observation: The closer the circle gets to being perpendicular to the line of sight, the narrower the ellipse.
2. Eye Level (Middle Section)
- Left: Stage 1 (citrus)
- Right: Stage d (apple)
- The cut face aligns parallel with the viewer’s eye level.
- The circle is compressed into a thin horizontal band—sometimes appearing almost as a straight line.
- Critical for accuracy: Even slight deviations above or below this line will reintroduce elliptical curvature.
3. Below Eye Level (Bottom Section)
- Left (Citrus): Stages 2 → 3
- Right (Apple): Stages f → i
- The viewer looks upward at the objects.
- The circular planes are seen at an opening angle, creating wider, rounder ellipses.
- Key Insight: “The further the forms get from the eye level, the wider the foreshortened circle gets…”
Practical Applications for Artists
| Concept | Application in Drawing |
|---|---|
| Ellipse Accuracy | Use this guide to calibrate the width-to-height ratio of rounded forms (wheels, plates, fruit, faces). |
| Horizon Line Placement | Always establish your eye level first—it dictates all foreshortening in the scene. |
| Still Life Composition | Arrange objects at varying heights to create dynamic perspective and depth. |
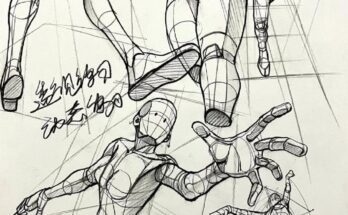
| Figure Drawing | Apply the same principle to joints (knees, shoulders) and rounded anatomy in posed figures. |
Pro Tip: The “Eye Level = Compression” Rule
“If it’s at your eye level, squash it. If it’s above or below, open it up.”
This simple mnemonic helps artists instinctively adjust elliptical forms without complex measurement.
Exercise for Students
- Set up a halved orange and apple on a table.
- Draw from three positions:
- Standing (above eye level)
- Sitting (eye level)
- Crouching (below eye level)
- Compare ellipses—note how the same circle morphs dramatically.
- Label your horizon line in each sketch for reference.
Why This Matters
Understanding this principle is non-negotiable for:
- Realistic still life
- Architectural rendering
- Character design
- Product illustration
- Classical atelier training
Perfect for art instructors, self-learners, and digital artists seeking foundational perspective mastery. Use this reference chart in your studio, classroom, or digital workspace to train your eye and hand to see—and draw—forms in true spatial relationships.


