How to Draw a Guitarist
Step-by-Step Character Illustration

Materials
✏️ Soft pencil (2B-4B)
📄 Sketch paper
🧽 Kneaded eraser
🎨 Optional: Ink pens or markers for outlining
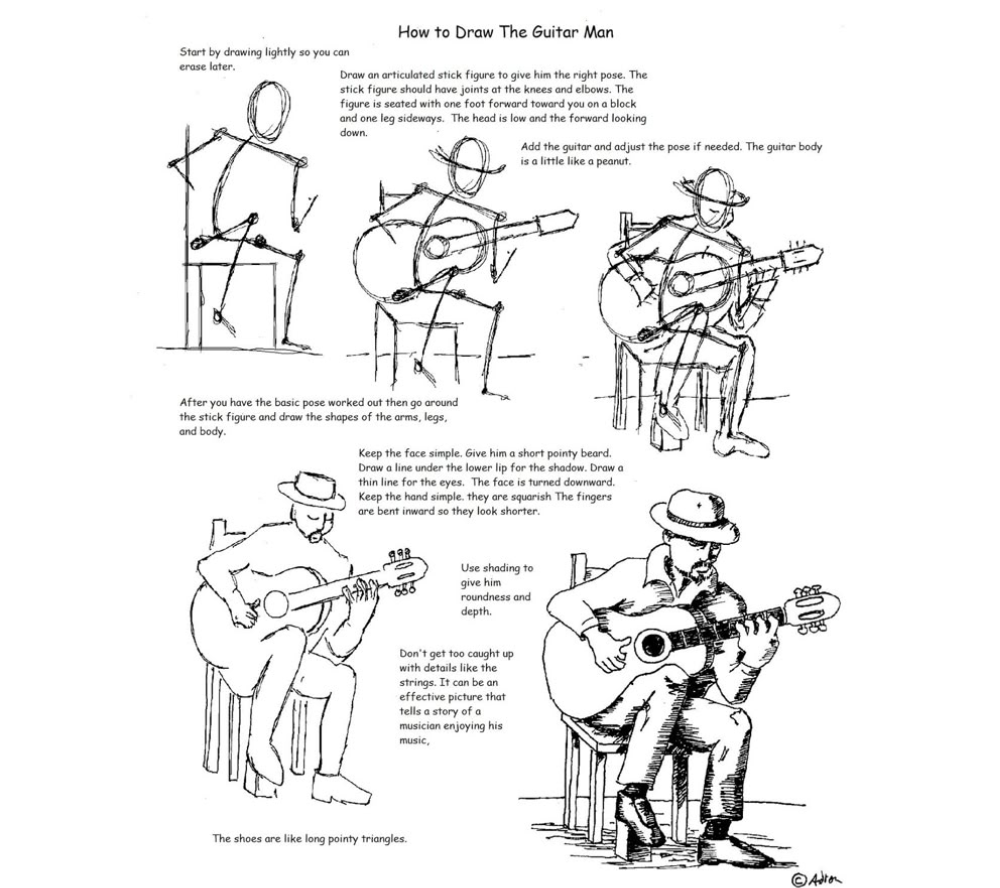
Step 1: Dynamic Pose
-
Stick Figure Base:
-
Draw a seated stick figure with:
-
Bent knees (one leg forward, one sideways).
-
Elbows bent at 90° for strumming posture.
-
-
Tilt the head downward (focusing on guitar).
-
-
Guitar Framework:
-
Sketch a peanut shape for the guitar body.
-
Add a long neck angled toward the chest.
-
Step 2: Body Structure
🦵 Limbs & Torso:
-
Thicken arms (slightly curved for relaxed strumming).
-
Use ovals for shoulders and knees.
-
Keep hands blocky (fingers curled inward).
👕 Clothing:
-
Flowy shirt sleeves (wrinkles at bends).
-
Pointed shoes (simplify as triangles).
Step 3: Facial Features
🧔 Bearded Musician:
-
Eyes: Thin lines (half-closed for concentration).
-
Beard: Short, pointy strokes (shadow under lower lip).
-
Head Angle: Tilted down (chin near guitar).
Step 4: Shading & Depth
✒️ Techniques:
-
Cross-hatching: Under arms, guitar edges.
-
Contrast: Darken beard and guitar soundhole.
-
Highlights: Leave shirt folds and guitar top bright.
🎸 Guitar Simplification:
-
Suggest strings with 2-3 parallel lines.
-
Omit frets for a stylized look.
Key Tips
✅ Storytelling: Capture the mood (e.g., hunched posture = soulful playing).
✅ Proportion Check: Guitar neck should reach collarbone.
❌ Avoid: Over-detailing fingers or strings.
Artist’s Note:
“Focus on the gesture—the emotion of playing matters more than technical accuracy.”
Final Touches
-
Add a stool or rustic block under the seated figure.
-
Optional: Splash of color on guitar or shirt.
Reference: Adapted from drawinglessonsfortheyoungartist.blogspot.com