The Mystery of Darkness: Interpreting Low-Light and Underexposed Fossil Photographs – A Paleontological Photography Tutorial
Description:
The provided image appears completely black, with no discernible details, colors, or subjects visible—a common occurrence in photography when dealing with low-light museum environments, underexposed shots, or technical errors during capture. This comprehensive tutorial explores the challenges of photographing fossils and skeletons in dimly lit exhibits, where dramatic lighting is used to highlight specimens while creating deep shadows. We’ll break it down step-by-step, offering professional tips for capturing stunning paleontological images, common pitfalls, post-processing techniques, and examples of successful dark-hall photography. Ideal for amateur photographers, museum visitors, educators, and enthusiasts, this guide transforms potential “failed” shots into opportunities for mastery.
Step 1: Understanding the “Black Image” Phenomenon – Why It Happens in Museum Settings
Museum fossil halls often employ low ambient light with focused spotlights to create atmosphere, protect sensitive specimens from UV damage, and direct viewer attention. This results in high contrast: illuminated bones glow against dark backgrounds, but automatic camera settings (e.g., on smartphones) struggle with exposure, leading to underexposed or entirely black frames.
In the submitted image, extreme darkness suggests:
- Insufficient light reaching the sensor (shutter speed too fast or ISO too low).
- No-flash policy (common in museums to avoid reflections/glare on glass cases).
- Camera shake in handheld low-light conditions.
- Possible file corruption or intentional blackout (e.g., placeholder).
Such images are frustrating but educational—many iconic fossil photos start as near-black raw files.
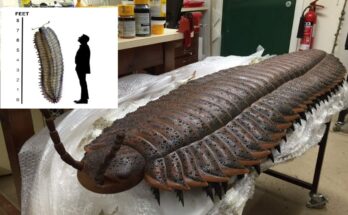
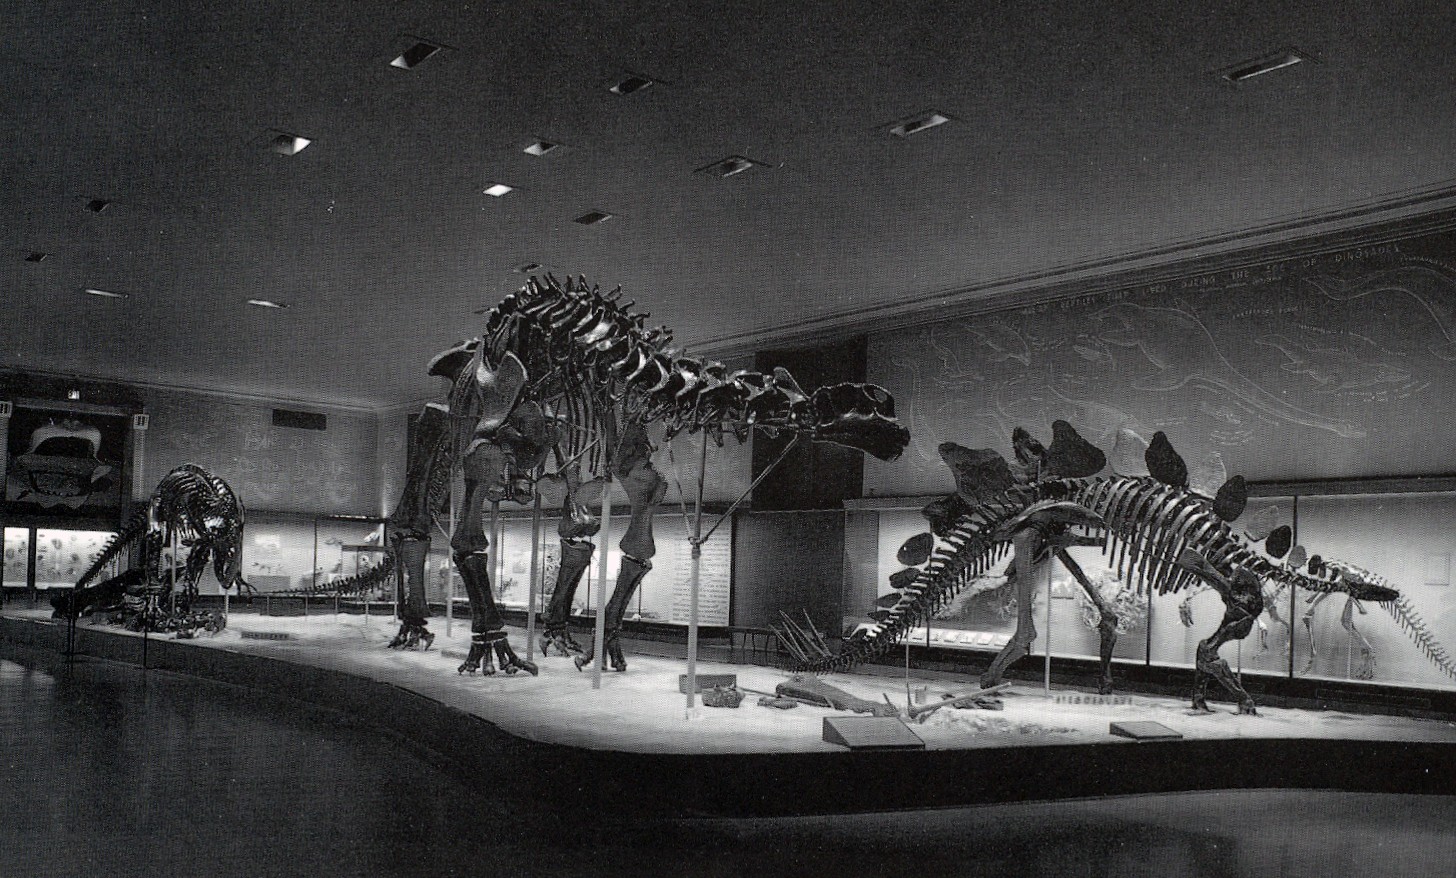
Example of a dimly lit dinosaur hall with dramatic spotlighting on skeletons:

Step 2: Camera Settings for Low-Light Fossil Photography – Essential Adjustments
To avoid black images, switch to manual or semi-manual modes:
- ISO: Increase to 800–3200 (or higher on modern cameras) for light sensitivity, but watch for noise.
- Shutter Speed: Slow to 1/60s or lower; use a tripod/monopod (if allowed) or brace against walls/rails.
- Aperture: Wide open (low f-number, e.g., f/2.8) for maximum light gathering.
- Exposure Compensation: +1 to +2 stops to brighten without overexposing highlights.
- White Balance: Custom or tungsten for warm museum lights.
- RAW Format: Shoot RAW for post-processing flexibility—recover details from shadows that appear black in JPEG.
Tutorial tip: Enable image stabilization; use live view histogram to avoid clipping blacks/whites.
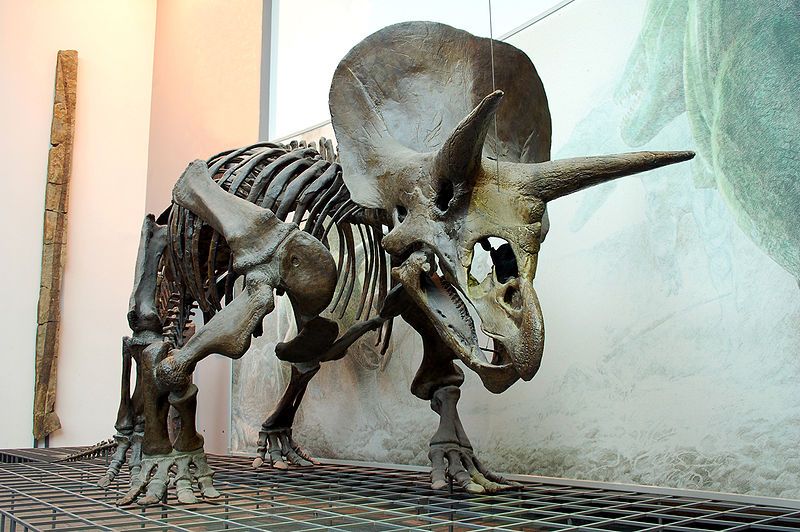
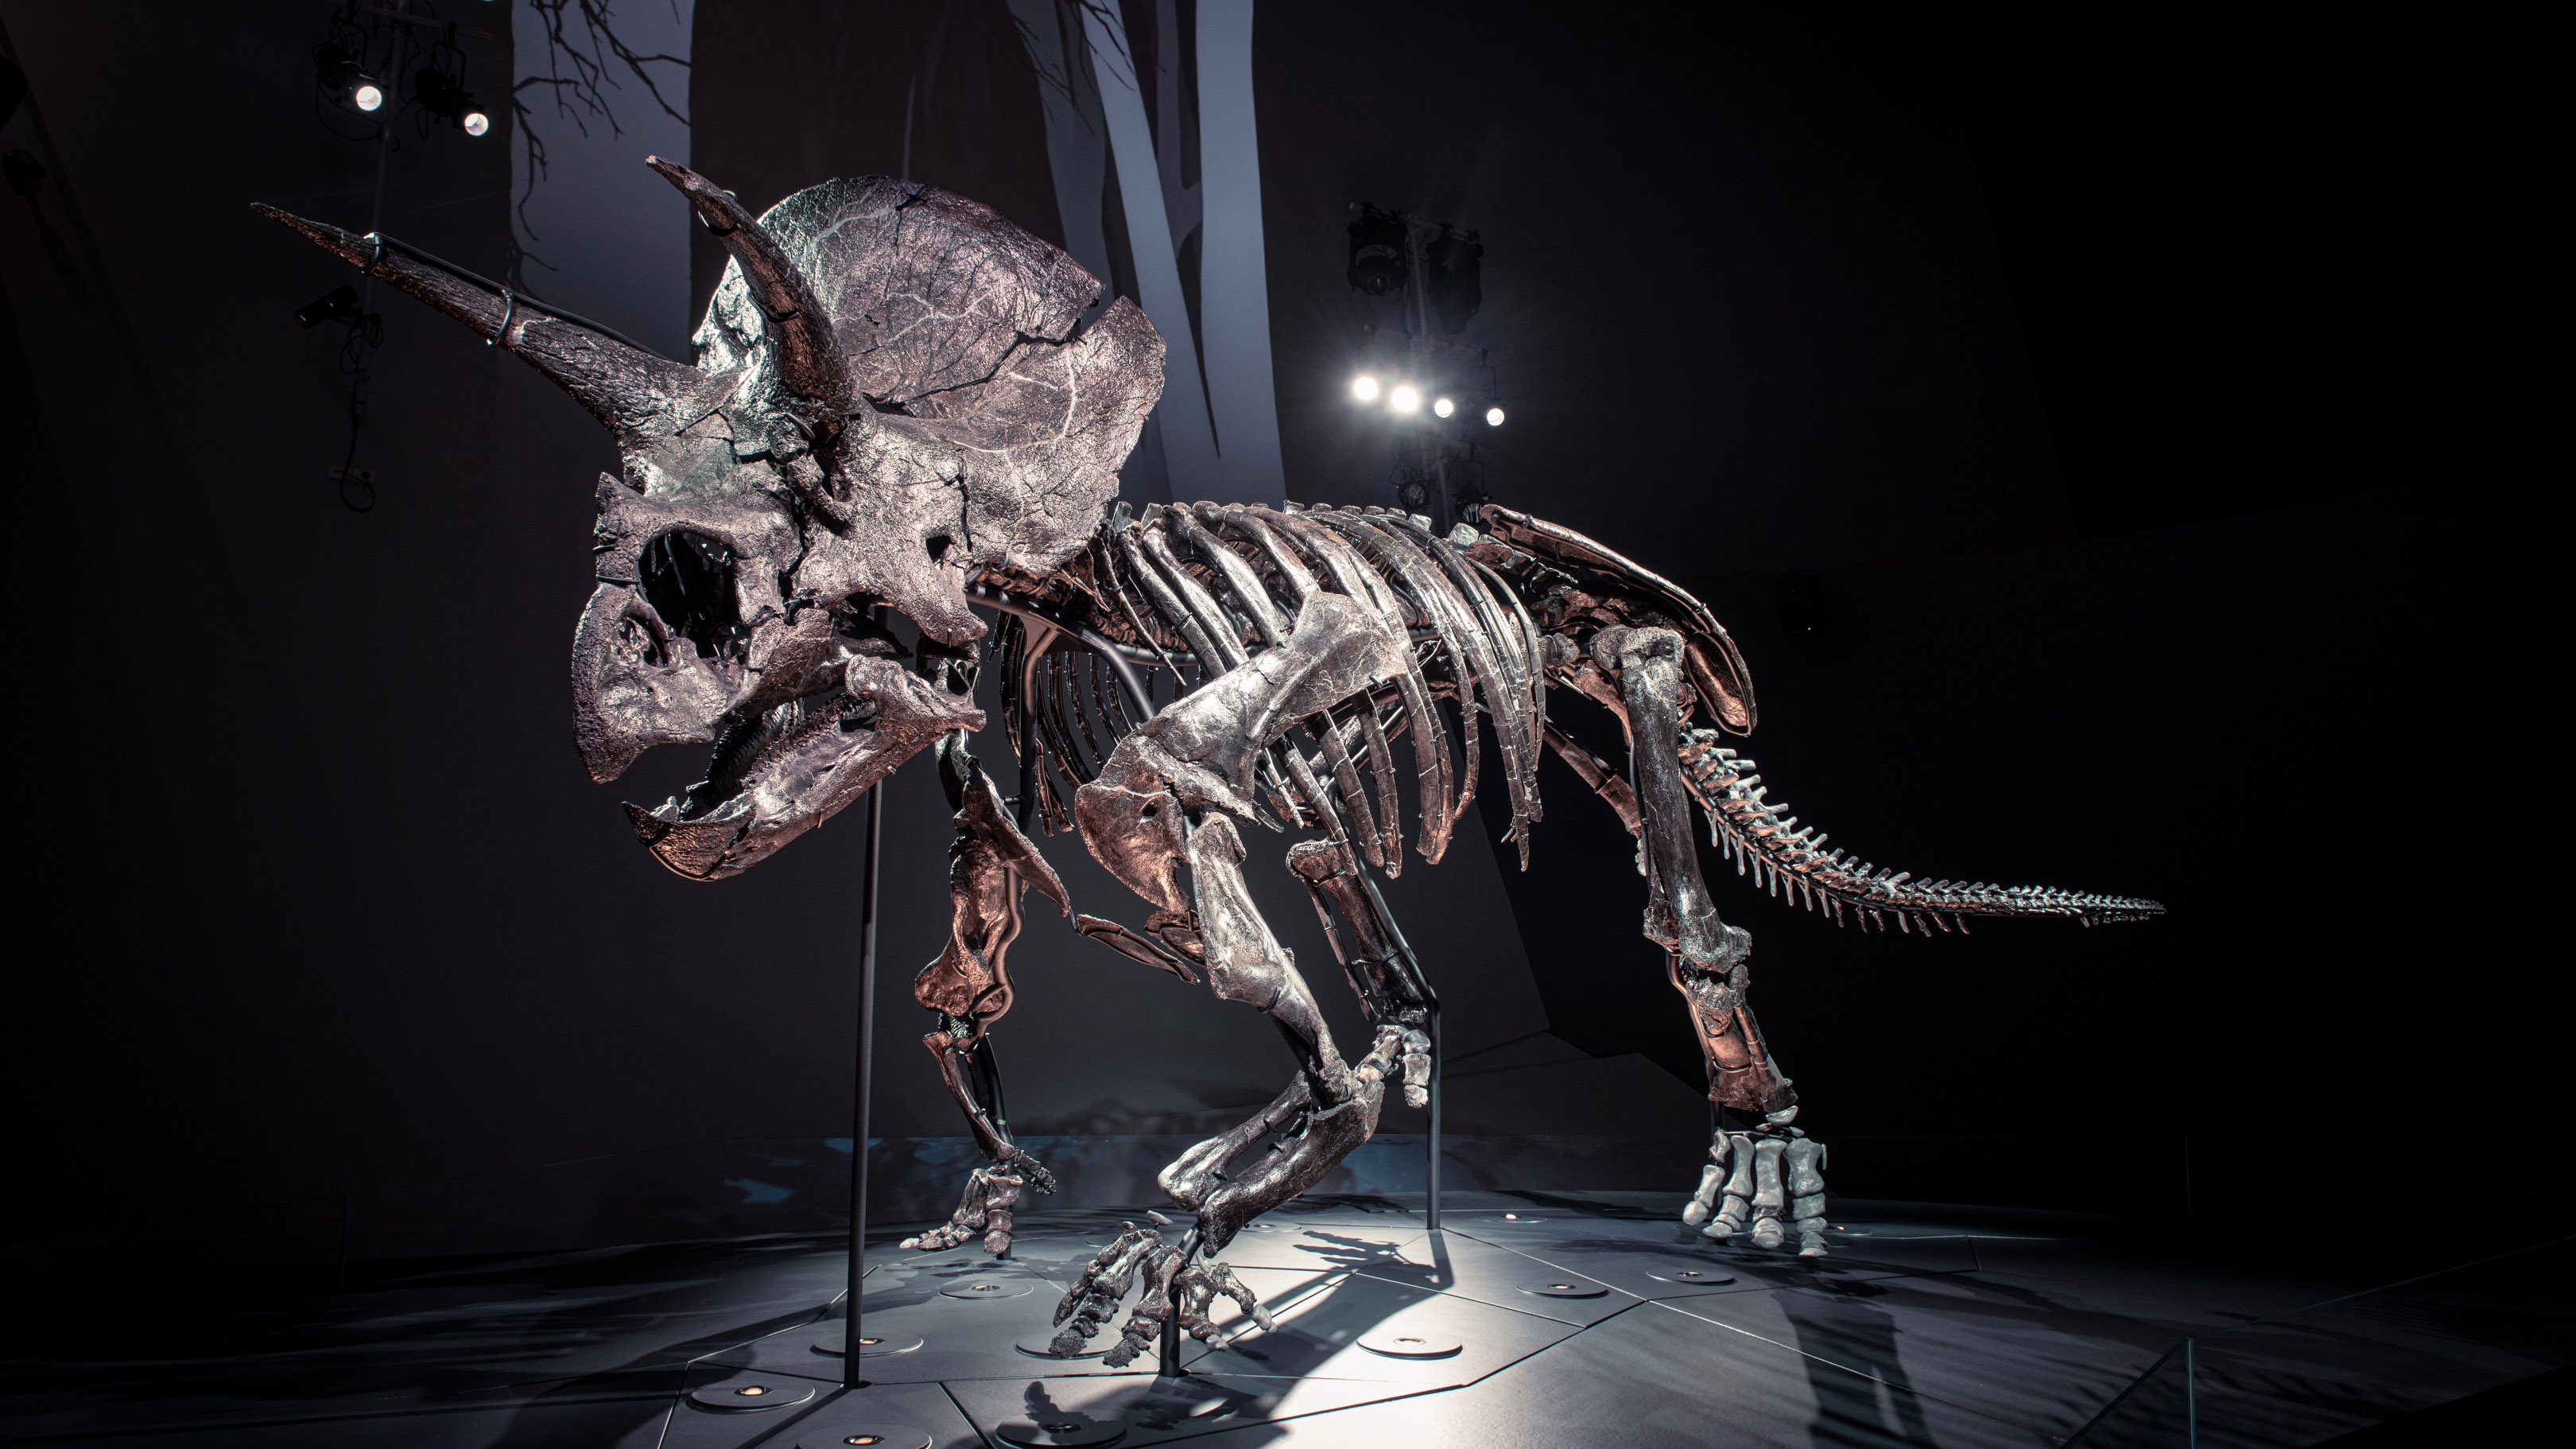
A well-exposed triceratops skeleton in a dark museum setting:
Step 3: Composition and Techniques – Capturing Mood in Dark Halls
Embrace the darkness for dramatic effect:
- Silhouettes and Spotlights: Position to use beams as natural frames.
- Long Exposures: 1–10 seconds for ethereal glow without flash.
- HDR Bracketing: Multiple shots merged for balanced exposure.
- Post-Processing: In software like Lightroom/Photoshop, lift shadows, reduce noise, and enhance contrast—often rescuing “black” images.
Avoid common errors: Flash (banned/reflective), zoom blur, or crowded framing.
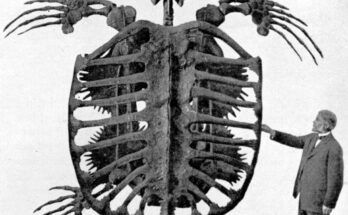
Low-light marine reptile exhibit with illuminated fossils emerging from darkness:

Step 4: Famous Dark Museum Exhibits – Inspiration from Real Displays
Many renowned halls use intentional darkness:
- American Museum of Natural History (NY): Saurischian/Ornithischian halls with spotlit mounts.
- Field Museum (Chicago): Evolving Planet’s moody Cretaceous sections.
- Natural History Museum (London): Dinosaur gallery with atmospheric blue lighting.
- Berlin’s Museum für Naturkunde: Tall Giraffatitan in shadowed grandeur.
These create immersion, evoking ancient worlds—your black image might simply need adjustment to reveal similar magic.
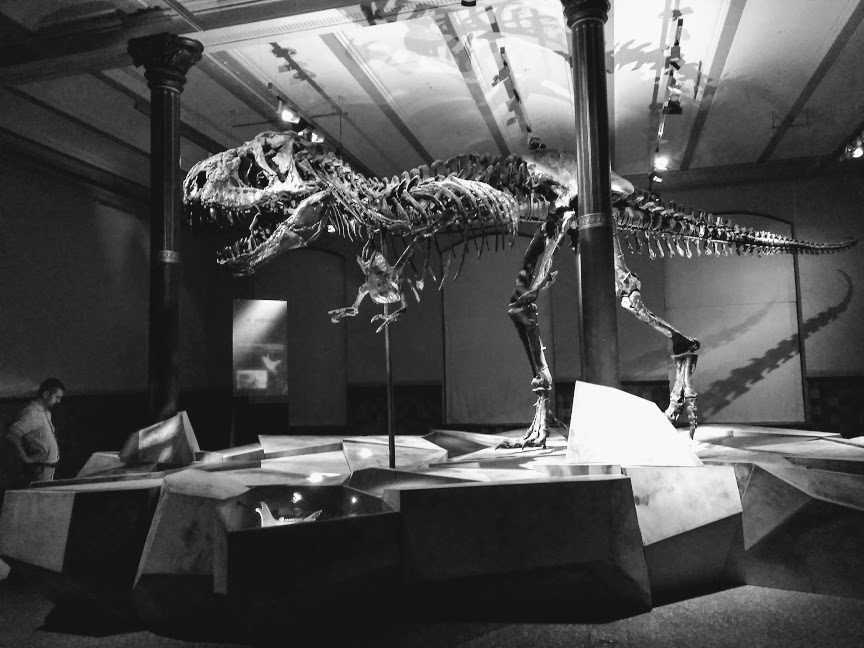
Titanosaur skeleton dramatically lit in a vast dark hall:
Step 5: Recovery and Editing Tutorial – Salvaging Black Images
If you have the original file:
- Open in editing software.
- Increase exposure/shadows (+50–100%).
- Apply noise reduction.
- Boost vibrance for mineral colors.
- Crop/composite if partial details emerge.
For completely irretrievable shots, reshoot with prepared settings.
Ethical note: Respect museum rules—no tripods in some areas; ask permission for professional gear.
Step 6: Advanced Tips and Alternatives
- Use apps like NightCap (iOS) for long-exposure phone photography.
- Visit during off-hours for fewer crowds/reflections.
- Study pros: Photographers like those documenting “Extinct Monsters” blogs capture stunning low-light fossils.
In summary, a black image like this is not a failure but a reminder of paleontology’s evocative lighting—master it, and your photos will convey the mystery of deep time as powerfully as any exhibit. Next time, adjust settings and transform darkness into drama!
Example of a rescued low-light fossil hall photo: