How to Draw an Orca (Killer Whale) Leaping: Step-by-Step Guide

This tutorial breaks down how to draw a dynamic orca mid-leap, focusing on shape, motion, and water effects. Perfect for beginners!
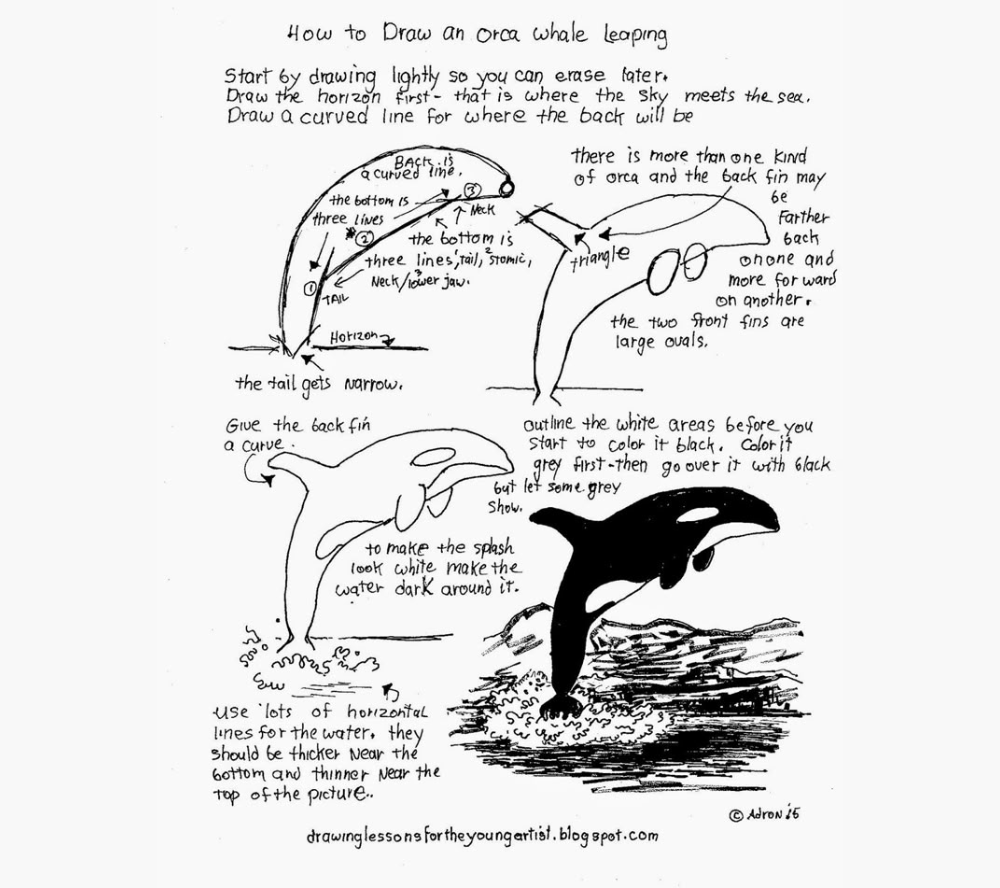
Step 1: Setup & Basic Shapes
-
Horizon Line: Lightly sketch where the sky meets the sea (helps anchor the scene).
-
Body Curve: Draw a smooth arched line for the orca’s back (peak = leap’s height).
-
Head & Tail:
-
Head: Round the front end of the curve for the nose.
-
Tail: Extend the back into a pointed tip (like a stretched “S”).
-
Step 2: Fins & Details
-
Dorsal Fin:
-
Place a tall, curved triangle on the back (position varies by species—draw yours farther forward or back).
-
-
Pectoral Fins:
-
Two large ovals near the head (like flattened footballs).
-
-
Eye & Markings:
-
Add a small eye near the head.
-
Outline the white belly patch (a wavy shape under the head).
-
Step 3: Splash & Water
-
Splash Effect:
-
Draw jagged, swirling shapes around the orca’s lower body.
-
Darken the water around the splash to make it look white.
-
-
Water Lines:
-
Use horizontal strokes—thicker at the bottom, thinner toward the horizon—to show waves.
-
Step 4: Refinement
-
Outline: Darken the orca’s body, fins, and key details.
-
Shading:
-
Shade the orca’s black areas, leaving the belly patch white.
-
Add light shadows under the fins for depth.
-
Pro Tips
-
Motion: Tilt the orca slightly upward to emphasize the leap.
-
Splash: Keep it asymmetrical for a natural look.
-
Color: Use dark blues/blacks for the orca and light blues for water contrast.
Try It!
-
Sketch the horizon → 2. Arch the orca’s back → 3. Add fins/splash → 4. Finalize details!
Need a visual reference? Imagine a banana shape with fins—then bring it to life! 🐋💦