How to Draw a Toucan: Step-by-Step Guide

This tutorial simplifies drawing a toucan into easy, structured steps—perfect for beginners or young artists. Follow these instructions to create a vibrant, stylized toucan with clear shapes and colors.
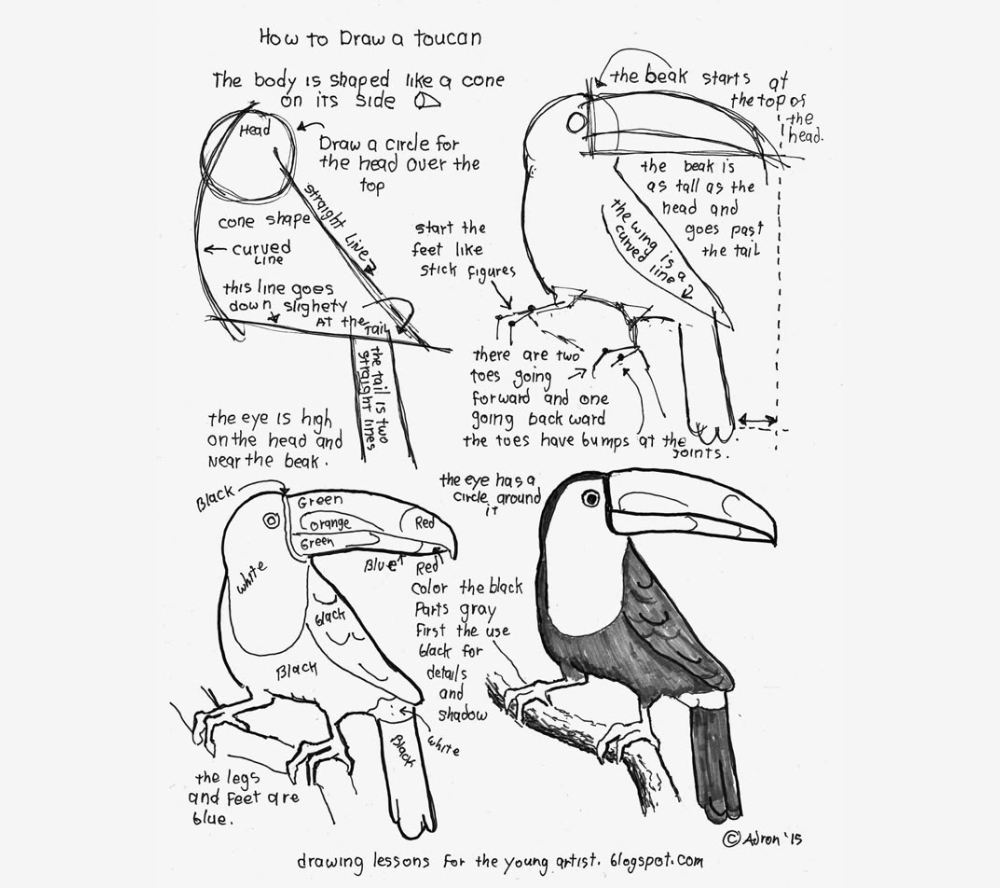
Step 1: Basic Shapes
-
Body: Draw a sideways cone (wide at the head, narrow at the tail).
-
Head: Add a circle overlapping the top of the cone.
-
Tail: Extend a slightly curved line from the cone’s tip (downward curve optional).
Step 2: Feet & Legs
-
Stick-Figure Start: Sketch thin lines for legs (angled slightly backward).
-
Toes:
-
Two toes forward, one backward (like a tripod).
-
Add bumps at the joints for realism.
-
-
Color: Shade legs and feet blue (or your preferred color).
Step 3: Head Details
-
Eye:
-
Draw a large circle, then a smaller inner circle for the pupil.
-
Add a thick ring around the eye (like goggles).
-
-
Beak:
-
Outline the beak following the cone’s wide end.
-
Color: Bright green (or mix green, blue, and red for tropical flair).
-
Step 4: Feathers & Texture
-
Black Feathers:
-
Use short, curved lines for a feathery texture.
-
Shade lightly with gray first, then layer black for shadows.
-
-
White/Color Patches:
-
Add white under the tail or chest.
-
Optional: Accent with red or blue on wings or beak.
-
Step 5: Final Touches
-
Outline: Darken key lines (beak, eyes, feet).
-
Background: Place the toucan on a branch (add simple leaves for context).
Quick Tips
-
Keep It Loose: Don’t over-detail—focus on bold shapes.
-
Color Boldly: Toucans are vibrant! Use markers or colored pencils for intensity.
-
Practice Variations: Try different beak sizes or poses (e.g., wings spread).
Need a Visual? Here’s a simple breakdown:
-
Cone + Circle → 2. Stick legs → 3. Beak/Eye → 4. Color!
Try it and share your toucan—I’d love to see your artwork! 🎨🐦