Step-by-Step Tutorial on Drawing a Mystical Crystal Cave: Structure, Gem Detailing, and Ethereal Lighting for Fantasy Illustration

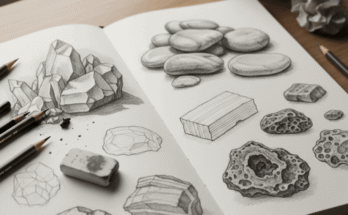
Drawing a mystical crystal cave offers artists a captivating opportunity to explore fantasy landscapes, blending geological realism with otherworldly enchantment for stunning visual narratives. This comprehensive tutorial is inspired by a reference sketch titled “Crystal Cave,” which depicts a cavernous interior with towering crystalline formations, shimmering reflections, and a faint silhouette of a figure exploring the depths. Rendered in pencil with intricate detailing and soft shading, the image features red construction lines to guide perspective, crystal placement, and light source direction, while annotations highlight key elements such as translucent facets, mineral veins, and a glowing central crystal. The composition evokes a magical, subterranean atmosphere, making it an ideal foundation for fantasy book covers, game environments, or mystical artwork.
This guide is crafted for intermediate artists, whether working traditionally with graphite on textured paper or digitally using tools like Procreate, Photoshop, or Krita, where layers can manage base sketches, crystal textures, and lighting effects. We’ll break it down into sections based on the reference: establishing perspective and cave structure, detailing crystals and mineral veins, refining the figure and reflections, and adding atmospheric context. Key techniques include mastering one-point perspective for depth, layering translucent gradients for gem-like quality, and using value contrasts to convey a magical glow. This approach suits fantasy settings, adventure illustrations, or animated sequences, encouraging reference from real cave photography (e.g., Carlsbad Caverns) or crystal specimens (e.g., quartz, amethyst). Start with light sketching tools (e.g., H pencil or 20% opacity brush), a ruler for symmetry, and an eraser for adjustments, progressing to B pencils or opacity builds for shading. Given today’s date—04:33 AM EDT on Monday, October 27, 2025—this tutorial aligns with a pre-dawn setting, enhancing the cave’s mystical ambiance with dim, ethereal light.
Section 1: Establishing Perspective and Cave Structure (Red Construction Lines)
The reference’s red lines provide a structural framework, capturing the cave’s vastness and balanced composition.
- Setting the Horizon Line and Vanishing Point: Draw a horizontal line across your canvas to represent the viewer’s eye level, placed low (e.g., one-fifth from the bottom) to suggest a deep interior view. Choose a one-point perspective with a vanishing point centrally aligned along the cave’s floor, converging lines upward toward the ceiling. The reference’s low-angle perspective enhances the cave’s grandeur, so tilt the horizon slightly downward. Mark the vanishing point with a light dot.
- Blocking in the Base Structure: Sketch the cave walls as irregular, curving planes, tapering toward the vanishing point, with a jagged ceiling and uneven floor. Add the central crystal formation as a tall, multifaceted prism, with smaller clusters radiating outward. The entrance is a faint arch at the back, drawn as an oval. Proportions: The central crystal should dominate (about 40-50% of height), with walls spanning 70-80% of the width. Use light lines to outline the figure’s silhouette.
- Practical Tips: Use a ruler for precision in perspective lines. Common error: Uneven convergence—measure angles to maintain consistency. Tip: Study cave cross-sections or crystal growth patterns for inspiration. Exercise: Draw a simple cavern with a central prism, applying one-point perspective, then adjust for a slight tilt to match the reference’s depth.
This foundation ensures structural integrity, preventing distorted or flat appearances.
Section 2: Detailing Crystals and Mineral Veins (Gem Texture)
The reference’s pencil work focuses on texture and detail, bringing the crystal cave’s magical quality to life.
- Crystal Facets: Refine the central prism with flat, angled planes, adding smaller facets as trapezoids or triangles converging toward the top. The image shows translucence, so use light shading with a gradient from dark edges to a bright core, suggesting inner light. Vary sizes: larger at the base, smaller at the peak.
- Mineral Veins: Sketch thin, irregular lines or bands across the walls, tapering as they recede, to indicate mineral deposits. The reference’s annotations suggest quartz or amethyst hues, so plan light from above-right with reflective highlights. Add texture with cross-hatching for rough stone and soft strokes for vein smoothness.
- Smaller Clusters: Detail surrounding crystals with overlapping ovals or hexagons, denser near the central formation. The image’s shading suggests depth, so blend shadows with a stump or airbrush.
- Application Notes: Use a light touch for translucence. Avoid mistake: Uniform facets—add imperfections for realism. Exercise: Detail a crystal cluster with veins and facets, then replicate on the walls.
These elements build the cave’s enchanting aesthetic, grounding it in geological fantasy.
Section 3: Refining the Figure and Reflections (Silhouette and Light Play)
The reference’s faint figure adds narrative, with reflections enhancing the magical mood.
- Figure Construction: Sketch the silhouette as a slender, upright shape with one arm raised, aligning with the central crystal. The image shows a flowing robe, so use wavy lines for the outline, tapering toward the feet. Keep details minimal to maintain focus on the cave.
- Reflection Detailing: Draw faint, distorted reflections of the figure and crystals on the cave walls and floor, using curved lines that follow the perspective. The reference’s annotations suggest a glow, so add soft halos around the figure’s hand and the crystal base.
- Integration Tips: Align the figure with the gesture line’s flow, ensuring reflections match the light source. Common pitfall: Over-detailing the figure—keep it shadowy. Exercise: Draw the silhouette with reflections, varying pose angles.
These elements bring a sense of exploration and wonder to the scene.
Section 4: Adding Atmospheric Context and Final Touches
The reference’s misty background and shading create a pre-dawn cave atmosphere, enhanced by 04:33 AM EDT lighting.
- Environmental Context: Sketch the cave floor with rocky debris and stalagmites, the ceiling with hanging stalactites, and the entrance as a faint glow. The image suggests a misty setting, so add faint fog layers. With 04:33 AM EDT lighting, use a cool blue-purple wash for pre-dawn light, casting shadows rightward.
- Shading and Highlights: Apply gradients on a Multiply layer—darkest in recesses (e.g., wall corners, figure base); brightest on crystal tops and the entrance glow. Use the above-left light source implied in the image, adding specular highlights (small white dots) on facets for a crystalline sheen.
- Final Details: Add a faint water drip, glowing moss patches, or a distant echo as sketch lines. The reference’s light shading hints at mist, so soften distant edges with a gray overlay (10-20% opacity).
- Critique and Adjustment: Erase guidelines, sign in a subtle corner (e.g., lower-right), and flip horizontally to check symmetry. Adjust shading if the crystals lose prominence.
Additional Professional Tips for Mastery
- Tools and Materials: 2H for outlines, 4B for shading; digitally, use custom gem brushes. Reference cave photos or crystal collections.
- Common Challenges: Perspective errors—use a horizon guide. For lighting, study pre-dawn cave images (e.g., 4-5 AM).
- Exercises and Resources: Weekly: 30-minute crystal cave sketches from different angles. Explore “Drawing Fantasy Art” by Gary Gerani or online geology art tutorials.
- Extensions: Add a companion (e.g., a guide), vary crystals (e.g., emerald, sapphire), or depict a magical ritual for narrative depth.
This tutorial transforms the reference into a practical roadmap, enabling you to craft a mystical crystal cave with confidence. Practice consistently, and explore variations like underwater caves or glowing portals in our related guides!