Understanding Linear and Atmospheric Perspective: A Complete Tutorial with Single-Point, Two-Point, and Depth Techniques

Introduction
Perspective is the cornerstone of realistic drawing and painting, enabling artists to create the illusion of three-dimensional space on a flat surface. This comprehensive tutorial explores three essential types of perspective illustrated in a beautiful hand-painted study: linear perspective (single-point and two-point) and atmospheric perspective.
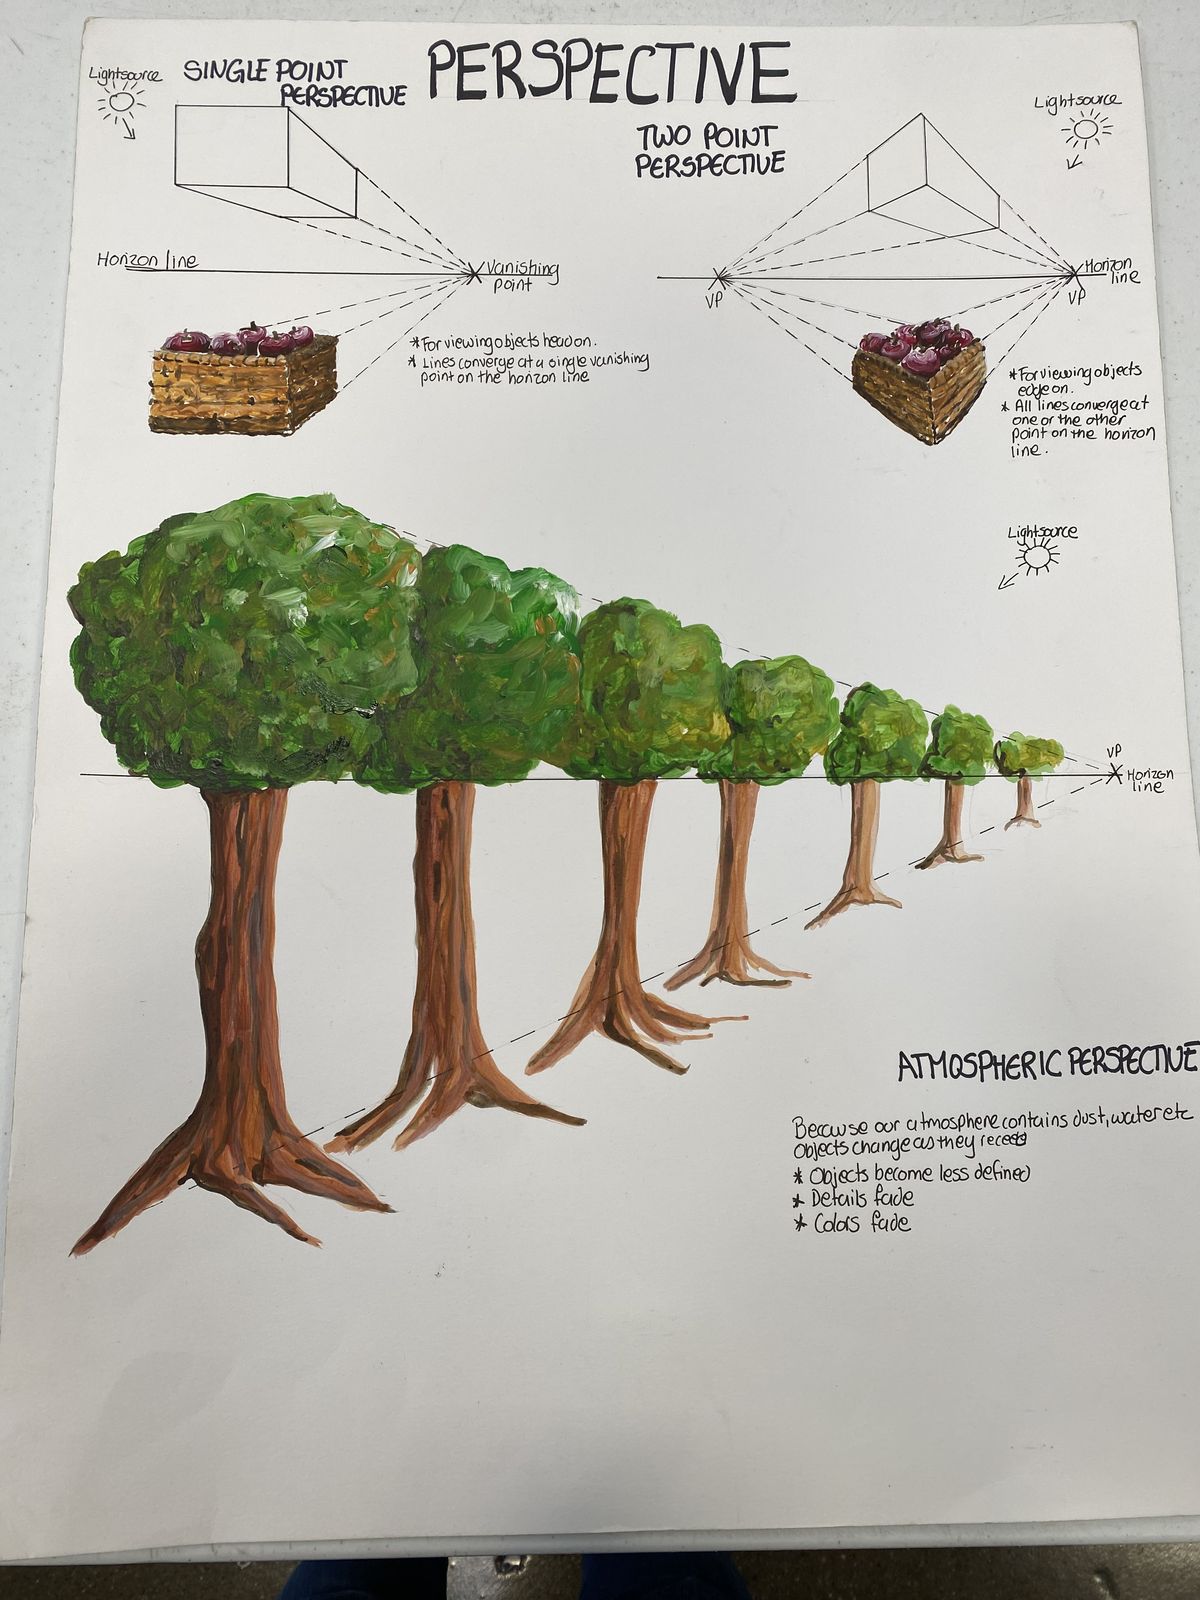
The reference artwork cleverly combines technical diagrams of boxes with a stunning row of receding trees painted in lush greens and browns. It demonstrates how objects appear to diminish in size, detail, and color intensity as they move farther away—perfect for landscapes, cityscapes, still lifes with depth, and any scene requiring convincing spatial recession.
By the end of this guide, you’ll understand how to set up horizon lines, place vanishing points, apply converging lines, and use atmospheric effects to make your artwork feel immersive and believable.
1. Single-Point (One-Point) Perspective
Single-point perspective occurs when you’re looking straight at a scene where parallel lines run perpendicular to your line of sight. All receding parallel lines converge to one vanishing point on the horizon line.
Key Characteristics:
- Ideal for hallways, roads, railroad tracks, or objects viewed head-on.
- Creates strong depth with a central focal point.
- Simple and dramatic—great for beginners.
How It Works (from the diagram):
- Draw a horizontal horizon line at eye level.
- Place one vanishing point (VP) on the horizon.
- Draw lines from the edges of foreground objects (like the sides of a box or basket) converging to that single VP.
- Vertical lines remain truly vertical; only depth lines converge.
Here are clear step-by-step examples of single-point perspective applied to basic cubes and scenes:
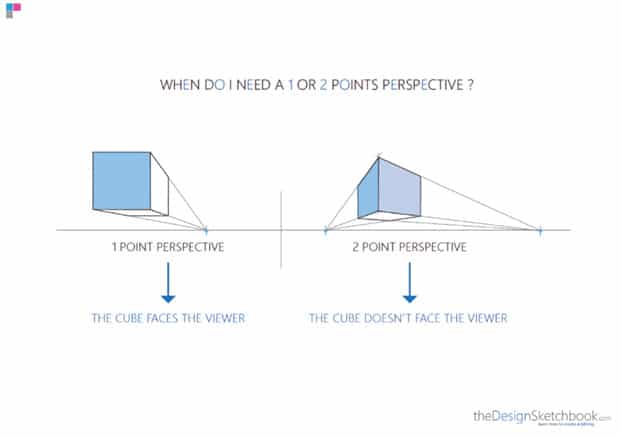
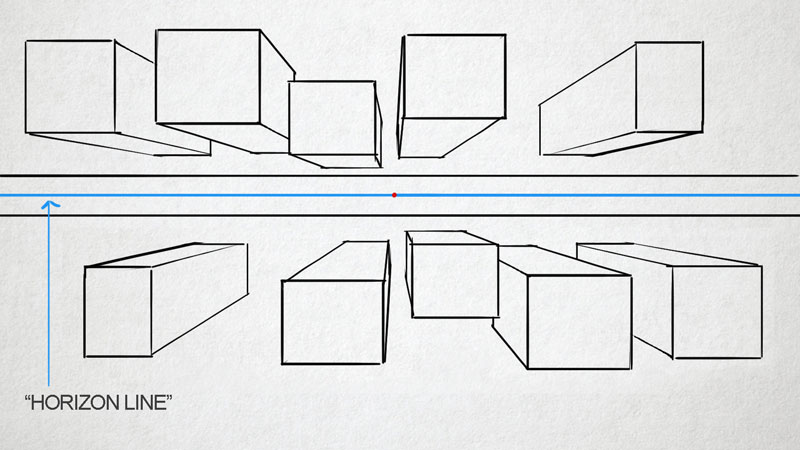

These illustrations show how a simple box or room recedes cleanly toward one central point.
In the reference artwork, the basket of apples demonstrates this principle perfectly: all sides converge to a single vanishing point, creating the illusion that the viewer is looking straight down the length of the object.
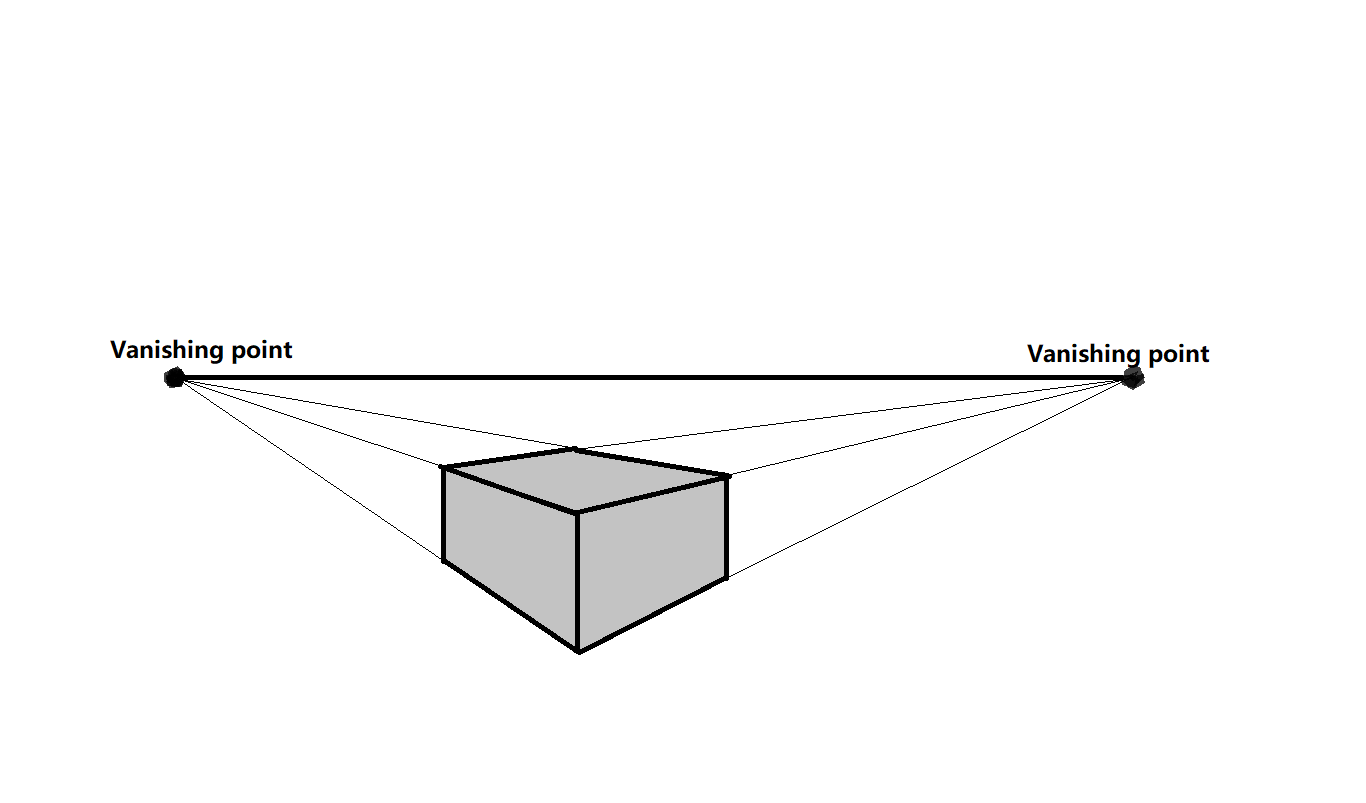
2. Two-Point Perspective
Two-point perspective is used when viewing an object or scene at an angle, so two sets of parallel lines recede in different directions. This is the most common type for drawing buildings, boxes viewed from a corner, or any object not aligned directly with your line of sight.
Key Characteristics:
- Two vanishing points on the horizon line.
- Vertical lines stay vertical.
- Creates dynamic, realistic angles—perfect for urban environments and angled compositions.
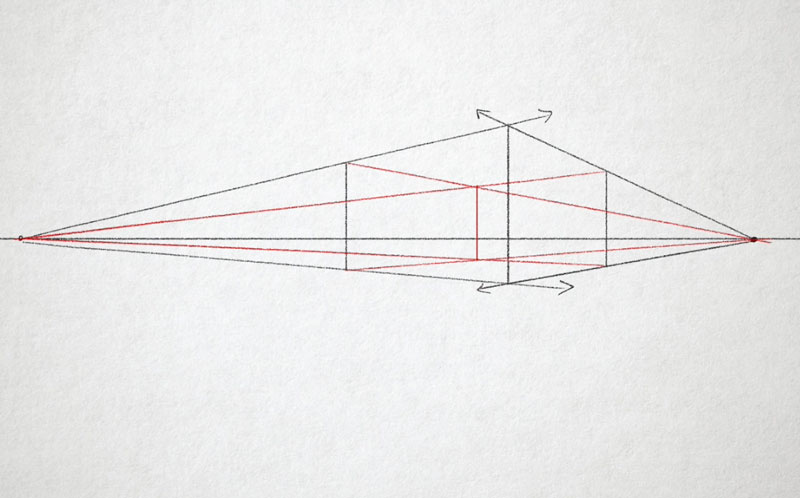
How It Works (from the diagram):
- Draw the horizon line.
- Place two vanishing points (usually one on each side).
- Draw lines from the object’s edges converging to each respective VP.
- The front corner remains closest to the viewer.
Study these excellent two-point perspective breakdowns:
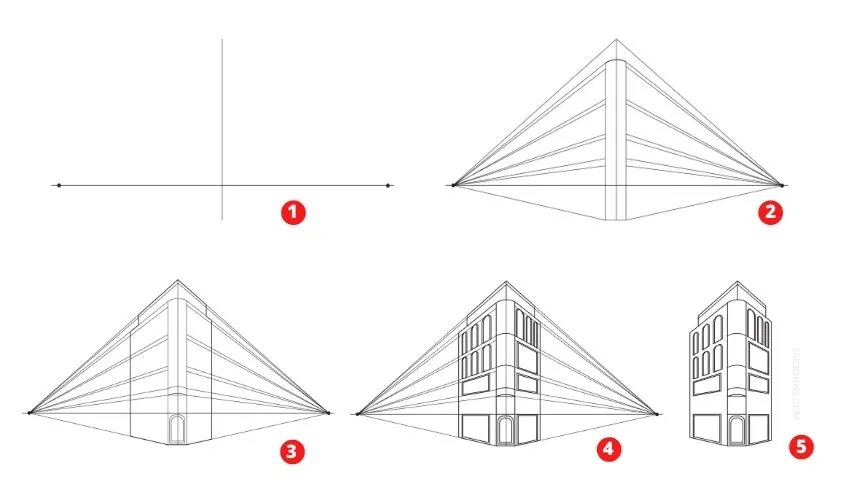
The reference sketch shows a basket viewed from an angle, with lines converging to two separate vanishing points—one for each visible side—creating a natural, three-quarter view.
3. Atmospheric Perspective (Aerial Perspective)
While linear perspective handles size and line convergence, atmospheric perspective explains how distance affects color, value, detail, and clarity due to the Earth’s atmosphere (dust, water vapor, haze).
Key Effects as Objects Recede:
- Colors become cooler, lighter, and less saturated (bluer/grayer tones).
- Details fade and become softer or lost.
- Contrast decreases.
- Objects appear hazier and less defined.
In the reference painting, the row of trees beautifully illustrates this:
- Foreground trees are rich, dark green with crisp details and strong shadows.
- Midground trees lighten and soften.
- Background trees fade into pale, muted greens, almost blending into the sky.
Here are powerful examples of atmospheric perspective in landscapes:


These images show layered mountains and trees fading into the distance—exactly the principle applied in the hand-painted row of trees.
Practical Application: Drawing a Row of Trees in Perspective
- Draw a horizon line and place one vanishing point.
- Sketch vertical tree trunks of decreasing height as they approach the VP.
- Add converging ground lines to guide spacing.
- Paint foreground trees with bold, saturated colors and sharp details.
- Gradually lighten values, reduce contrast, and soften edges for distant trees.
- Use cooler greens/blues in the background.
The reference artwork masterfully combines linear perspective (size reduction and convergence) with atmospheric perspective (fading color and detail) to create impressive depth.
Conclusion
Mastering single-point, two-point, and atmospheric perspective unlocks realistic depth in any artwork. Start with simple boxes to understand vanishing points, then apply these rules to organic subjects like trees, roads, or cityscapes.
Practice by recreating this classic row-of-trees exercise: set up your horizon, place a vanishing point, draw diminishing trunks, and layer atmospheric effects with lighter, cooler tones in the distance.
This technique transforms flat drawings into immersive worlds. Grab your sketchbook, experiment with different eye levels and vanishing points, and watch your scenes come alive.
Happy creating—your perspective game is about to reach new heights! Share your own perspective studies in the comments; we’d love to see your progress.