Mastering One-Point Perspective: The Essential Guide to Creating Convincing Backgrounds and Depth in Your Drawings

Introduction
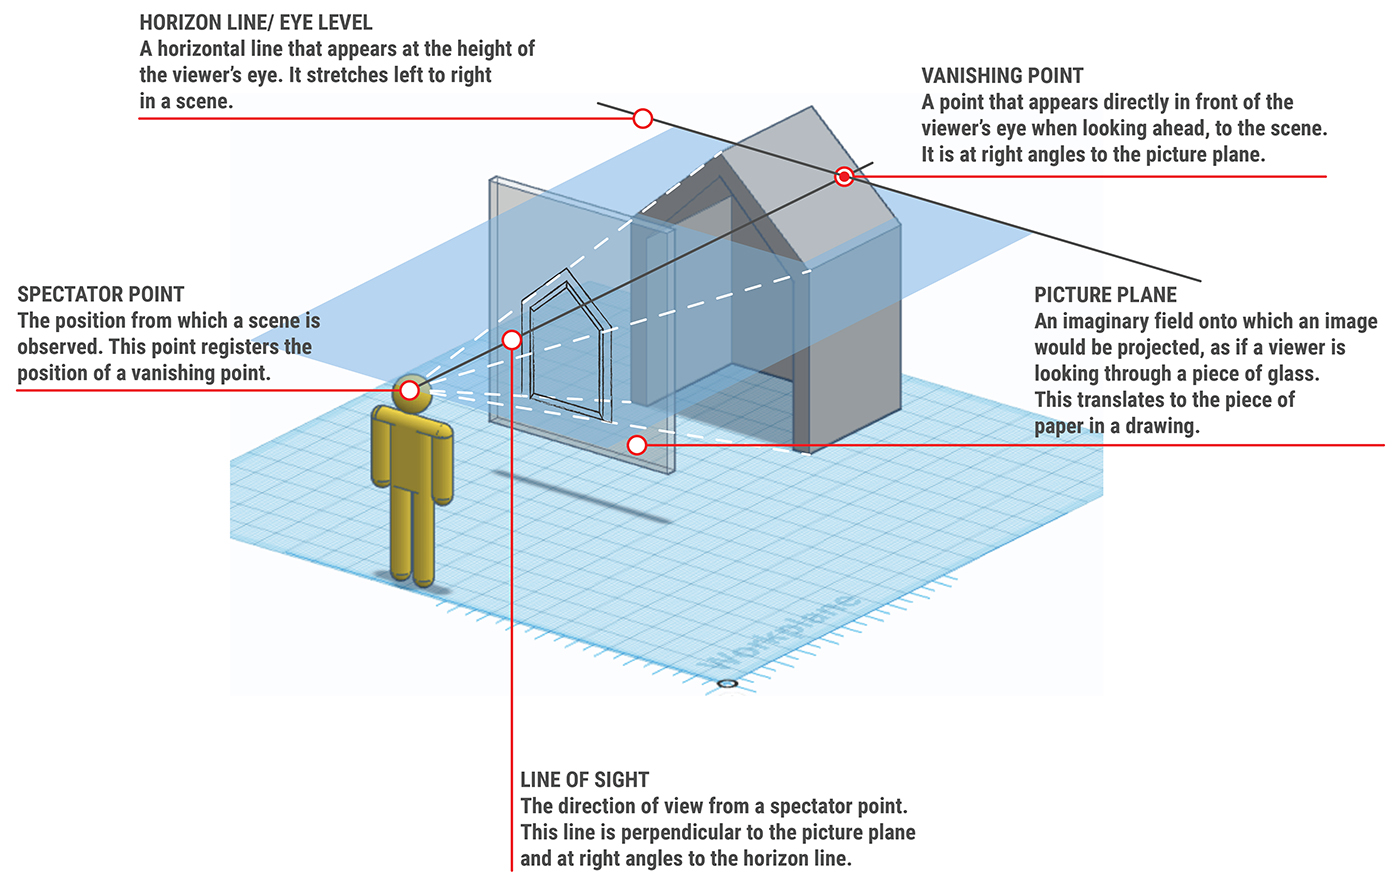
One-point perspective is one of the most fundamental and powerful tools in an artist’s toolkit for depicting three-dimensional space on a flat surface. It creates the illusion of depth by having all parallel lines converge toward a single vanishing point on the horizon line. This technique is especially useful for drawing hallways, roads, sidewalks, tiled floors, interior rooms, and any scene where the viewer looks directly forward, with parallel elements receding straight into the distance.
This tutorial, inspired by clear, hand-sketched notes, walks you through the core concepts of one-point perspective step by step. Whether you’re a beginner learning the basics or an intermediate artist refining your backgrounds, you’ll discover how to control the viewer’s eye level, place objects realistically, and sell depth effectively. No fancy tools needed—just pencil, paper, and an understanding of how the “camera” (your viewpoint) affects the scene.
Here are some classic examples of one-point perspective in action to help visualize the concept:
These diagrams show the classic tiled floor and converging lines that form the backbone of one-point perspective.
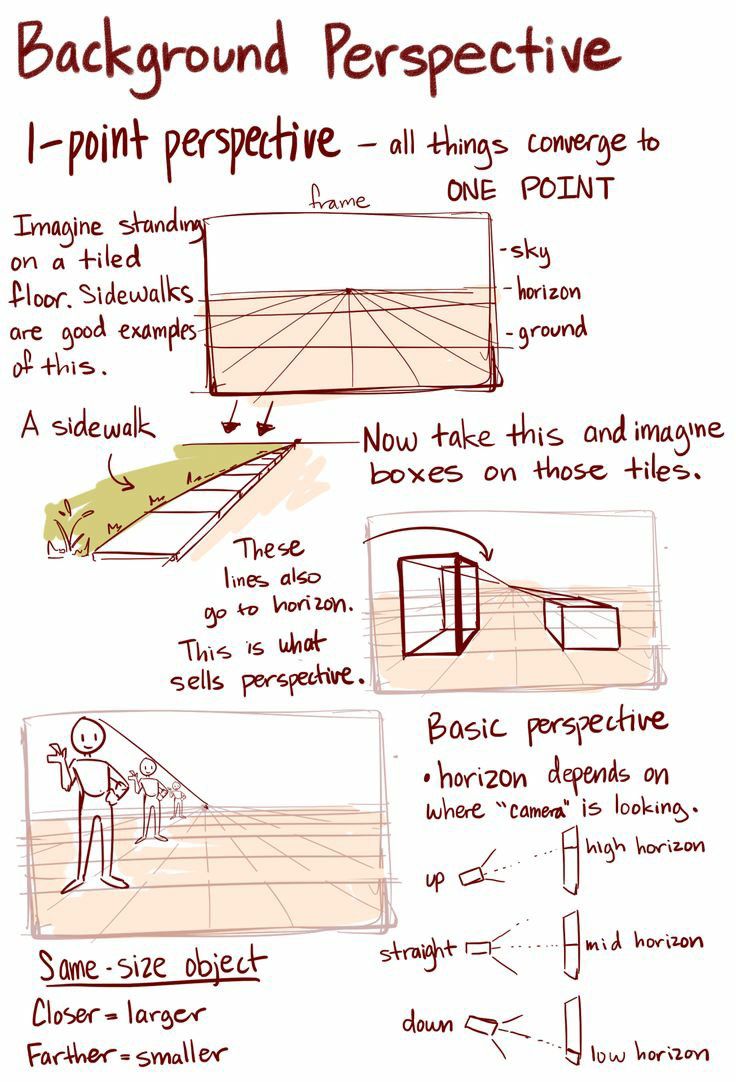
Core Principles of One-Point Perspective
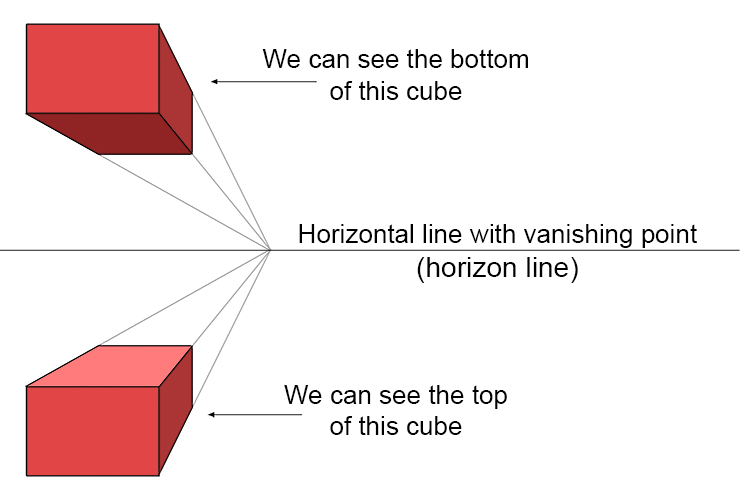
- The Vanishing Point All parallel lines that run perpendicular to your line of sight converge to one single point on the horizon line. This is the vanishing point (VP). In real life, this mimics how distant objects appear to shrink and meet at infinity.
- The Horizon Line (Eye Level) The horizon line represents your eye level. It divides the scene into sky above and ground below.
- High horizon → Looking down (bird’s-eye view)
- Mid horizon → Looking straight ahead (most natural)
- Low horizon → Looking up (worm’s-eye view)
- Size and Distance Rule Objects of the same actual size appear larger when closer to the viewer and smaller when farther away. This size difference, combined with converging lines, is what “sells” the illusion of depth.
Here are visual examples illustrating how the horizon line position changes the view:
These breakdowns show high, mid, and low horizon effects clearly.
Step-by-Step: Building a Classic One-Point Perspective Scene (Sidewalk Example)
Follow these steps to create a convincing sidewalk or hallway background:
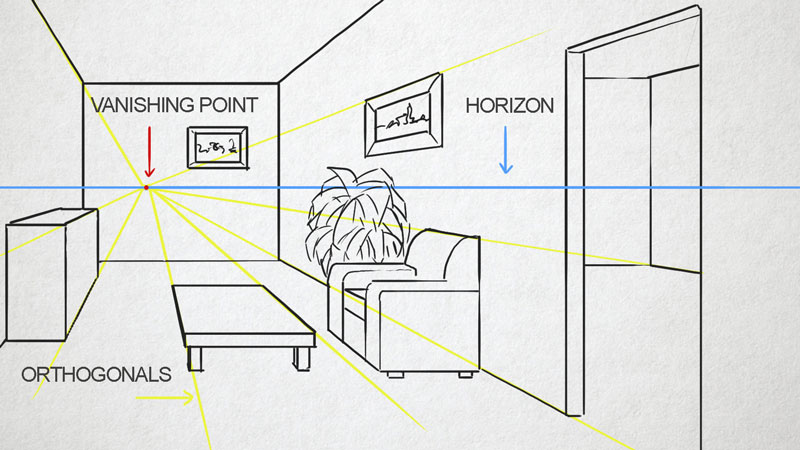
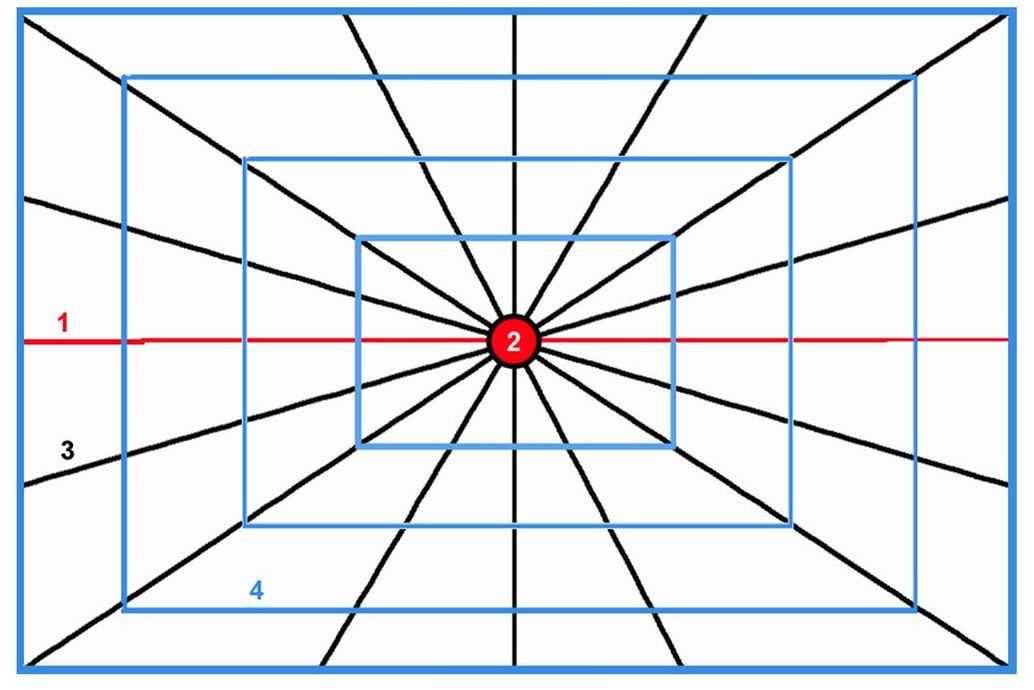
- Draw the Frame and Horizon Line Lightly sketch a rectangle for your composition. Draw a horizontal line across it—this is your horizon line (eye level).
- Place the Vanishing Point Choose a spot on the horizon line (usually near the center for a natural look). This is your vanishing point.
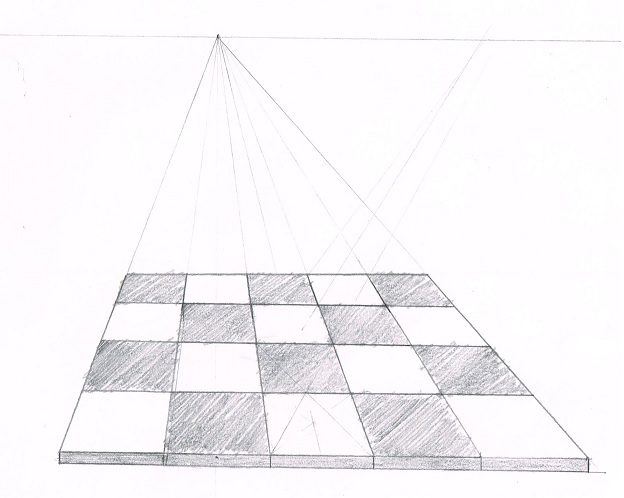
- Create the Ground Plane From the bottom corners of your frame, draw lines converging to the vanishing point. These represent the edges of the sidewalk or floor. Add horizontal lines across to create tiles or paving slabs.
Here’s a clean grid example to reference:
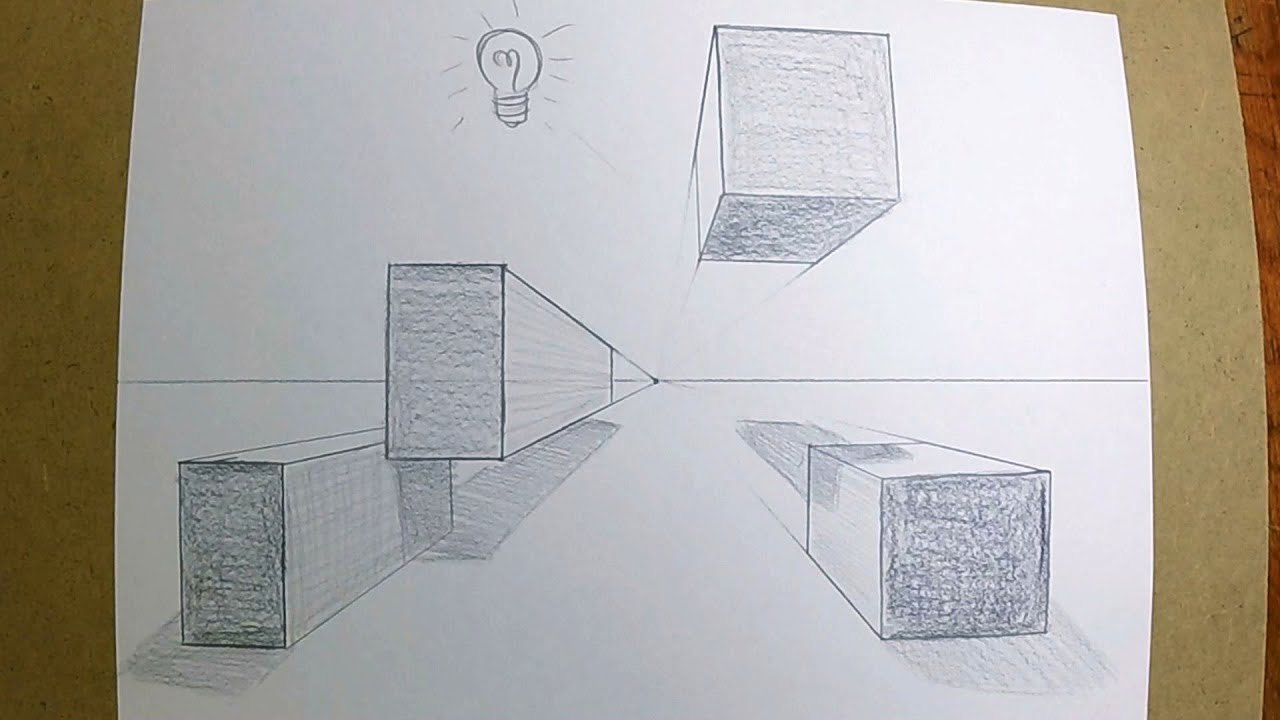
- Add Receding Elements Place boxes or objects on the tiles. Draw vertical lines straight up (parallel to the picture plane) and connect the top edges back to the vanishing point. This ensures everything recedes correctly.
- Incorporate Foreground Interest Add larger objects or figures in the foreground for scale contrast. Notice how closer figures appear much bigger than distant ones, even if they’re the same height.
Example of boxes placed on a perspective grid:
- Add Figures to Demonstrate Scale Place stick figures or characters at different distances. The same-size objects will appear dramatically different in scale depending on their position.
See this in action with simple figures:

Common Applications and Tips
- Sidewalks and Roads — Perfect for urban scenes; the converging lines guide the viewer’s eye deep into the composition.
- Hallways and Interiors — Use a central vanishing point for dramatic depth.
- Avoid Common Mistakes
- Don’t place the vanishing point too close to the edge (creates extreme distortion).
- Keep vertical lines truly vertical—only depth lines converge.
- Use the horizon line intentionally to control mood: high for overview, low for dramatic emphasis.
A full street scene example built step by step:

Conclusion
One-point perspective is the foundation of believable backgrounds in illustration, comics, concept art, and fine art. By mastering the horizon line, vanishing point, and size-distance relationship, you can create immersive scenes that draw the viewer in and make your world feel real. Practice by drawing everyday environments like hallways, streets, or rooms—start simple, then add complexity with figures and details.
Keep experimenting with different eye levels to change the emotional tone of your work. The more you draw these converging lines, the more intuitive depth will become. Happy sketching—your backgrounds are about to level up!
For more practice resources, try recreating these classic grids and scenes in your sketchbook. Share your results in the comments below!