
How to Sharpen a Pencil With a Knife for Drawing
Artists sharpen their pencils to ultra long, sharp points for a reason. A point like this enables artists to use a variety of different grips, that gives flexibility in the kinds of techniques and pencil strokes that can be created.
For instance, you can hold the pencil in the overhand grip to make large sweeping strokes, use the side of the pencil core to create large, even areas of shading and vary the line thickness. Ultimately, when you sharpen a pencil to a long point, it will give you more control over your line quality in a drawing.
I find it especially useful for the early stages of a drawing, when I’m blocking in the rough lines and shapes that establish the composition of the piece.
In this guide, I’ll show you how to sharpen a pencil with a knife. Learn what you need and the steps required to create a long, tapered point to your pencil.
Disclaimer: Fine Art Tutorials is a reader supported site. When you make purchases through links on this site, we may earn a small commission at no extra cost to you.
Sharpen your pencil like an artist: Video tutorial

Watch the video tutorial and follow along.
Supplies needed

You’ll need:
- A pencil (a longer, new pencil is preferable)
- A craft knife (X-acto)
- A Jar to collect the pencil shavings
- Fine grit sandpaper (180 grit works well)
- A cover for your table
- Pencil extenders (for drawing with shorter pencils)
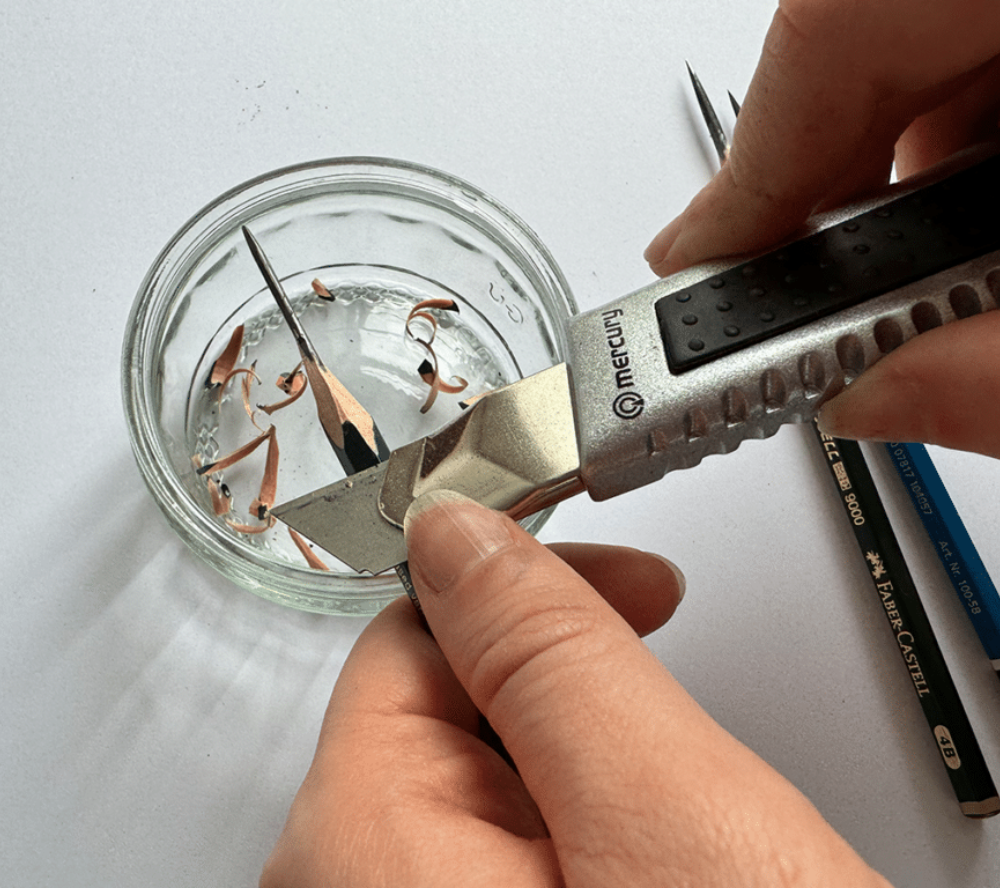
Grip the pencil and knife

The first step, is to grip the pencil and knife properly. I start by holding the knife in my right hand, which is my dominant hand. If you are left handed, you may feel more comfortable holding it in your left. Then, in my left hand I hold the pencil at around a right angle to the knife, with my thumb on top. You use your thumb to push the back of the knife to sharpen the pencil. The back of the knife is a bit sharp, so I push onto the knife casing.
I hold the knife at a shallow angle to the pencil, so that it’s almost flat, then carefully push my thumb along the pencil casing to shave off the wood.
Gradually shave the wooden casing

Start about an inch away from the end of the pencil and carefully start shaving it away. I work by gradually rotating the pencil in my left hand to start shaving off the wood casing. With the knife, you should be able to feel when you get to the glue that separates the pencil core from the wood. When I get to this section, I carefully control the knife in my right hand to flatten the angle even more, so that it is completely level with the pencil core.
Continue this process of rotating the pencil, slowly shaving away the wood. I’m doing it slowly so that I make sure not to make any dents in the pencil core itself. Sharpen, until the lead is of an even length all the way around.

I sharpen my pencils to around an inch and half, which gives me enough space to work with when drawing.
Sand the pencil lead to a point

The next step is to refine the tip of the pencil with sanding paper. If you’re using a strip of sanding paper, make sure it’s flat on the surface.
Hold your pencil at a shallow angle to the sanding paper and use light pressure, to sand it back and forward. You will need to slowly rotate the pencil so that it’s even on all sides. I aim for a tapered ultra sharp point. If you can see obvious edges or sides to the pencil lead, sand these off because that can create uneven shading marks when you come to draw. Make sure not to make the lead so thin that it’s fragile, but sand it enough that it’s sharp, even and tapered.
This method of sharpening a pencil creates quite a lot of dust. You can actually collect and use this graphite powder in a drawing. You could either apply it with a soft brush or use a blending stump to paint it on the paper. With the graphite powder, you can create some ultra smooth, soft smoky shadow effects.
