
How to Draw a Peacock: Step-by-Step Guide
Create a stunning peacock with this easy-to-follow tutorial, focusing on its iconic teardrop-shaped body and elaborate tail feathers. Perfect for beginners!

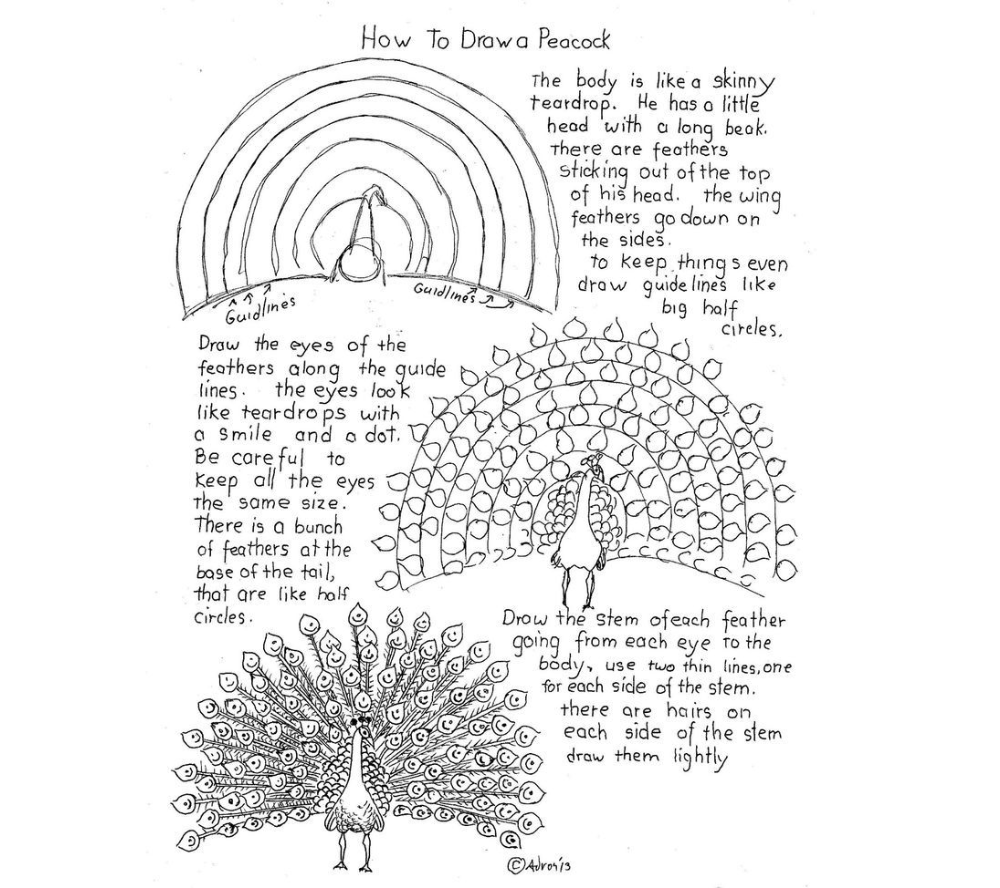
Step 1: Basic Body Structure
-
Body:
-
Draw a skinny teardrop shape (pointed end = tail area).
-
-
Head & Beak:
-
Add a small circle for the head on top of the teardrop.
-
Attach a long, thin triangle for the beak.
-
-
Crest Feathers:
-
Sketch 3–5 short, wavy lines sticking up from the head.
-
Step 2: Wing & Base Feathers
-
Wings:
-
Draw curved lines down the sides of the body (like a cloak).
-
-
Tail Base:
-
Add layered half-circles at the bottom of the teardrop for short feathers.
-
Step 3: Tail Feathers (The Showstopper!)
-
Guidelines:
-
Lightly sketch 3–4 large half-circles radiating from the tail base (like a fan).
-
-
Feather Eyes:
-
Along each guideline, draw teardrop shapes with:
-
A smile curve at the top.
-
A dot inside (keep sizes consistent).
-
-
-
Stems & Barbs:
-
Connect each eye to the body with two parallel lines (stem).
-
Add tiny “V” shapes along the stems for feather barbs (lightly sketch).
-
Step 4: Final Details
-
Legs & Feet:
-
Draw thin, zigzag lines for legs and three toes (one pointing back).
-
-
Enhancements:
-
Darken the eyes and stems for contrast.
-
Add light shading under the body/wings for depth.
-
Pro Tips
-
Symmetry: Use the half-circle guides to keep feathers evenly spaced.
-
Texture: For a metallic look, add tiny swirls inside the feather eyes.
-
Color: Peacocks shine with blues, greens, and golds—try colored pencils or markers!
Try It!
-
Teardrop body → 2. Head/crest → 3. Tail guidelines → 4. Feather eyes → 5. Stems/details
Need a visual? Imagine a fancy fan attached to a bird—then dazzle it up! 🦚✏️