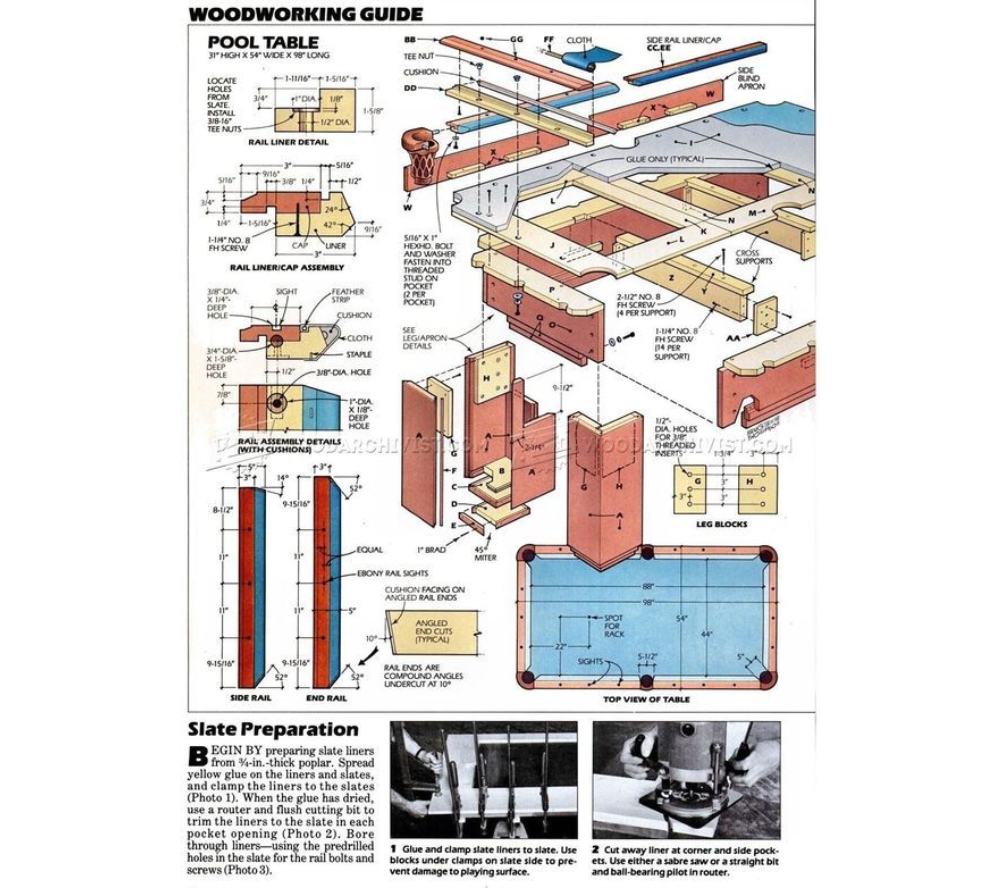

The image appears to be a section of a “POOL TABLE WORKING GUIDE,” providing step-by-step instructions for preparing slate liners during the construction or assembly of a pool table. Here’s a detailed description:
Image Content Description:
-
Title: “POOL TABLE WORKING GUIDE” is prominently displayed at the top.
-
Instructions: The text provides a guide for preparing slate liners, which are crucial for securing the slate bed of a pool table. The steps include:
-
Material Preparation: Use “%-in.-thick poplar” (likely a typo, possibly “½-in.-thick poplar”) for the liners.
-
Adhesive Application: Spread yellow glue on both the liners and slates before clamping them together (referenced as Photo 1).
-
Drying & Trimming: After the glue dries, a router with a flush-cutting bit is used to trim the liners to match the slate at each pocket opening (referenced as Photo 2).
-
Boring Holes: The text cuts off but mentions boring through the liners using a “predmish” (likely a typo for “predrilled” or a specific tool).
-
-
Visual Cues: References to Photo 1 and Photo 2 suggest accompanying images (not visible here) demonstrating the clamping and trimming processes.
-
Format: The text is instructional, with a mix of technical terms (e.g., “flush cutting bit,” “yellow glue”) and implied tools (router, clamps).
Context:
This is likely part of a woodworking or pool table assembly manual, focusing on ensuring a precise and level playing surface by securely attaching slate liners to the frame. The incomplete sentence at the end hints at further steps (possibly drilling holes for bolts or fasteners).
Notable Details:
-
Emphasis on precision (trimming liners flush with slate).
-
Use of woodworking techniques (gluing, clamping, routing).
-
Assumes familiarity with tools like routers and clamps.