How to Draw a Rustic Flower Fence: Step-by-Step Worksheet

Materials Needed
✏️ HB pencil (light sketching)
📄 Medium-texture paper
🎨 Optional: Colored pencils/watercolors
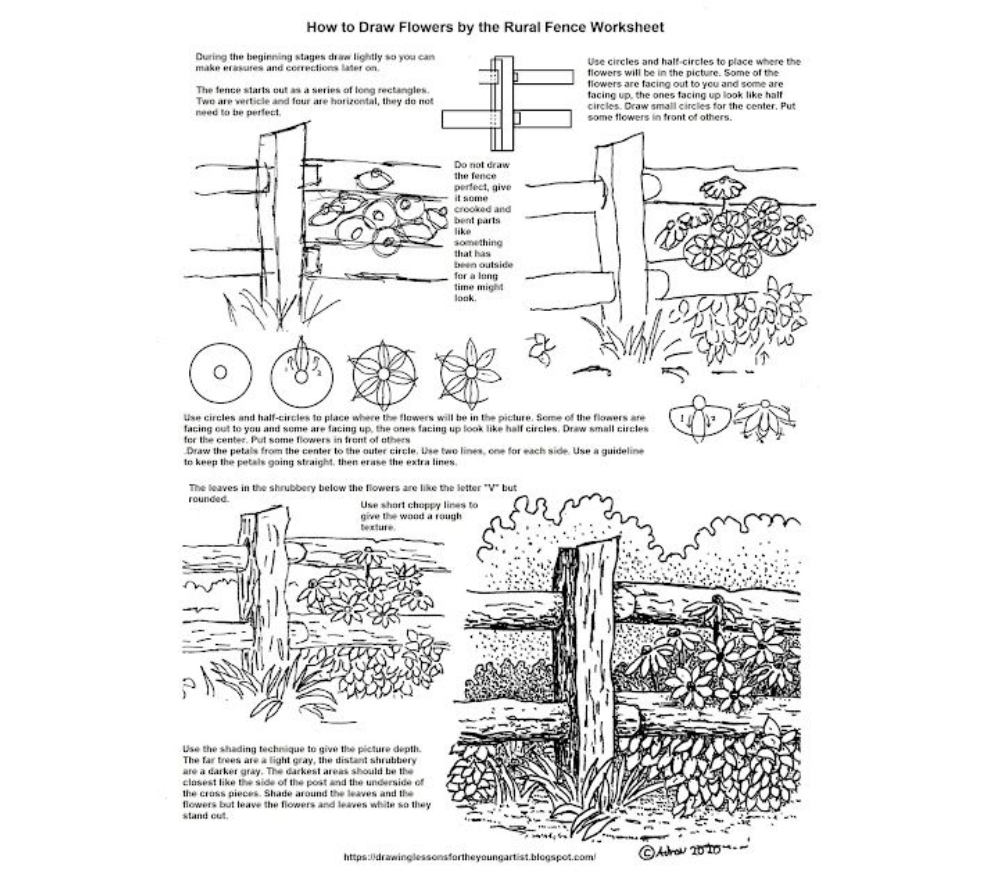
1. Sketch the Fence Structure
🖌️ Guidelines:
-
Draw 2 vertical lines (posts)
-
Add 4 horizontal lines (rails) – uneven spacing adds charm
-
Tip: Use wobbly strokes for a weathered look

2. Flower Placement
🌸 Composition Tips:
-
Circles: Full blooms (front view)
-
Half-circles: Side-facing flowers
-
Overlap: Place some blooms behind fence rails for depth
Avoid: Perfect symmetry – nature is irregular!
3. Petal & Leaf Techniques
🌼 Petals:
-
Draw from center outward (like sun rays)
-
Vary lengths/sizes for realism
🍃 Leaves: -
“Y” shapes with serrated edges
-
Cluster in groups of 3-5
4. Texturing & Shading
✒️ Details:
-
Fence: Short, jagged lines for wood grain
-
Ground: “V” strokes for grassy patches
🎨 Shading:-
Far fence: Light gray (less detail)
-
Foreground leaves: Darker tones under edges
-
5. Final Enhancements
✨ Pop Effects:
-
Leave flowers/leaves white against shaded background
-
Add tiny dots in flower centers
-
Optional: Faint blue wash for sky
Common Mistakes & Fixes
| Issue | Solution |
|---|---|
| Stiff flowers | Vary petal curves |
| Flat fence | Add knots/cracks |
| Muddy shading | Layer tones gradually |
Pro Tip:
“Photograph real fences/flowers for texture inspiration!”
Want More? I can:
-
Provide flower type templates (daisies, poppies)
-
Demo watercolor blending for petals
-
Share seasonal variations (snowy fence, autumn vines)
(Techniques adapted from John Muir Laws’ nature drawing methods)