How to Draw a Cat Sitting on a Fence
A Step-by-Step Guide for Beginners

Materials Needed
✏️ Pencil (HB or 2B)
📄 Paper
🧽 Eraser
🖍️ Optional: Colored pencils/markers
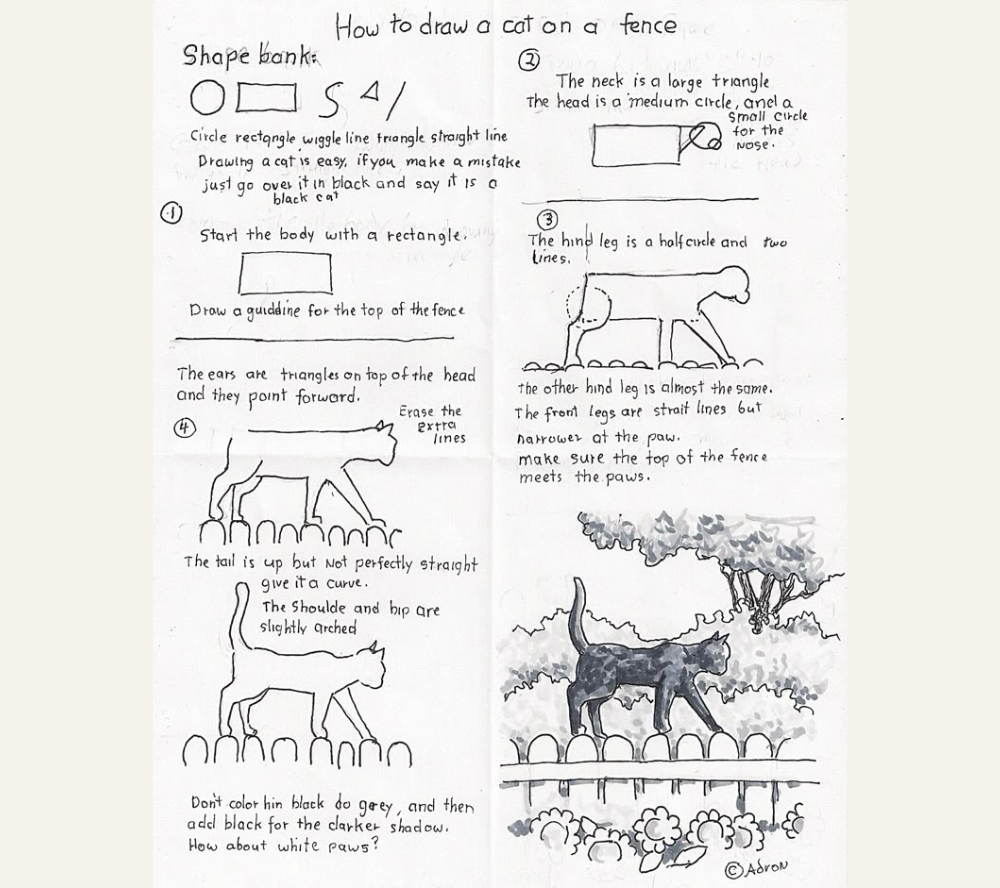
Step 1: Basic Shapes (Framework)
-
Fence Guideline:
-
Draw a horizontal wavy line for the fence top.
-
-
Cat Body:
-
Rectangle for the torso (slightly arched for posture).
-
Large triangle for the neck.
-
Medium circle for the head + small circle for the nose.
-
 Use light strokes for easy erasing.
Step 2: Head & Ears
-
Ears: Two triangles pointing forward (slightly tilted).
-
Face:
-
Eyes: Almond shapes (angled toward nose).
-
Whiskers: Three short lines on each cheek.
-
Pro Tip:
“Place the nose circle halfway between the eyes and chin.”
Step 3: Legs & Tail
-
Front Legs: Straight lines tapering to paws (resting on fence).
-
Hind Legs: Half-circles with curved lines (one slightly hidden).
-
Tail: Curved upward (like a question mark).
 Keep legs asymmetrical for natural pose.
Step 4: Refine & Detail
-
Fur Texture: Short strokes for shoulders/hips.
-
Paws: Oval shapes with tiny toe lines.
-
Fence: Add vertical planks beneath the cat.
Step 5: Shading & Color
🎨 Recommended Palette:
-
Body: Light gray base (shadow under belly).
-
Paws/Chest: White accents.
-
Eyes: Yellow/green with slit pupils.
Avoid: Solid black—use gradients for depth.
Common Mistakes & Fixes
❌ Stiff Tail: Add a gentle S-curve.
❌ Flat Ears: Tilt one slightly back.
❌ Fence Issues: Ensure paws overlap the fence line.
Final Touches
-
Background: Sunset or garden leaves.
-
Whimsy: Add a butterfly or bird nearby.
Style Variations:
-
Cartoon: Exaggerate eyes and tail.
-
Realistic: Blend fur with layered strokes.