Essential Principles
✏️ “Cross-hatching is sculpting with lines – every stroke should reveal form.”

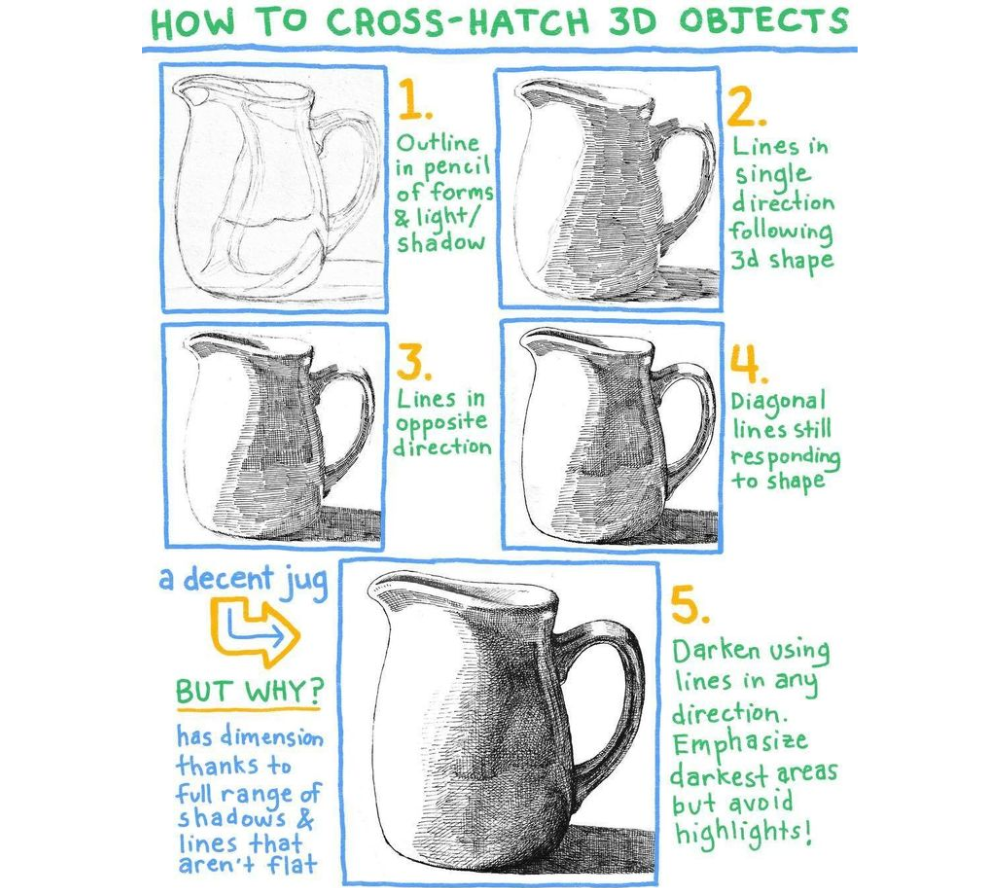
5-Step Professional Technique
1. Outline & Plan
-
Lightly sketch the object’s form and shadow areas
-
Mark highlight zones (keep these line-free)
-
Pro Tip: Use a 2H pencil for guidelines
2. First Direction Hatching
-
Draw parallel lines following the object’s contours
-
Example: For a sphere → use curved lines radiating outward
-
Density:
-
Light areas → sparse lines
-
Shadows → tighter spacing
-
3. Opposing Angle Layer
-
Add perpendicular lines (45-60° angle to first set)
-
Maintain consistent curvature with the form
-
Common Mistake: Avoid 90° grids (creates flat look)
4. Diagonal Reinforcement
-
Add intermediate angles (30° or 75°)
-
Focus on transition zones between light/shadow
-
Advanced: Vary line weight (thicker in deep shadows)
5. Final Darkening
-
Use multi-directional strokes in darkest areas
-
Avoid:
-
Overworking highlights
-
Uniform darkness (preserve value range)
-
Why This Works
✅ Creates Depth
-
Curved lines mimic surface geometry
-
Layered angles build gradual tonal transitions
✅ Enhances Texture
-
Wood: Follow grain direction
-
Metal: Add sharp highlight gaps
✅ Professional Results

Left: Flat grid
Right: Form-responsive hatching
Common Mistakes & Fixes
| Issue | Solution |
|---|---|
| “Flat” appearance | Curve lines with the form |
| Muddy shadows | Build layers gradually |
| Harsh transitions | Use intermediate angles |
Pro Tips
🔹 Tool Control:
-
Fine liners (0.1-0.3mm) for precision
-
Brush pens for organic textures
🔹 Practice Exercises:
-
Draw 3 spheres with different line styles
-
Try fabrics vs. metal surfaces